[How to] Upgrade your PS4 to an SSD
This guide will work for all models of PlayStation 4, however the location of the hard-drive bay is different between models.
Replacing your Hard Drive will NOT void your warranty and is covered in an official support article.
Why would you want to do this?
A few reasons. Namely: * You need more space for games. Many PS4s ship with a 500GB HDD which can be filled quickly.
- You want faster load times. Upgrading your PC or Laptop to an SSD makes a night and day difference to performance. The PS4 is hampered by a mechanical drive, so by upgrading it so an SSD we should expect a similar performance increase.
How long will it take?
I was able to have my PS4 back up and running playing games in about 4-5 hours. The majority of this comes from the time taken to backup and restore the data on the PS4 (including all of the games).
For reference, I had about 332GB of content on my PS4's existing HDD. The actual drive swap took 10 minutes at most.
I recommend going through your PS4's library and deleting any games that you haven't played in a while. This will drastically cut down the backup and restore time. Most disc based games consume 30-50GB of space.
What will you need?
| Tool | Usage |
|---|---|
| 1x External Hard Drive | This is used to backup your existing PS4 HDD so we can restore all of your content to your new SSD or HDD. |
| 1x USB Drive (at least 2GB) | When you install the new drive into the PS4, you need to re-install the PS4 Operating System as well. We'll be loading a copy of the software onto this USB and using it for the install. |
| 1x Phillips Head Screwdriver | You'll need a small one. There are at least 5 screws you'll need to undo to access the drive. |
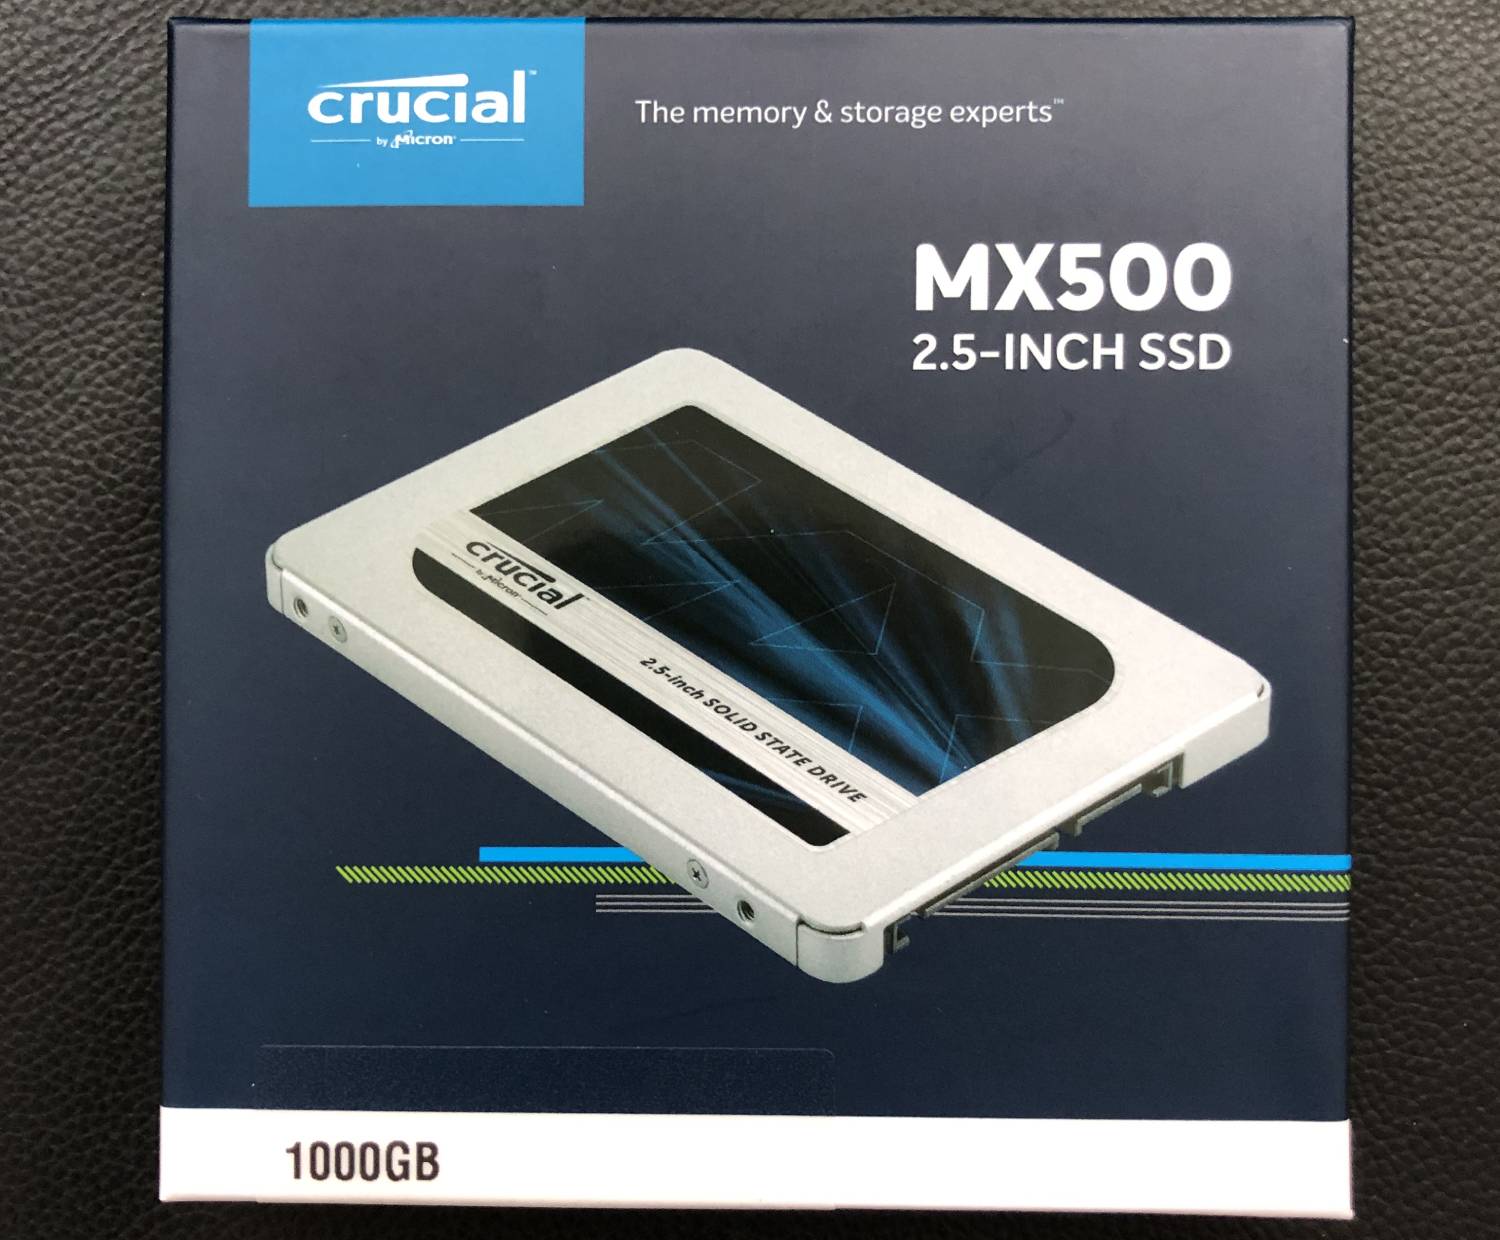
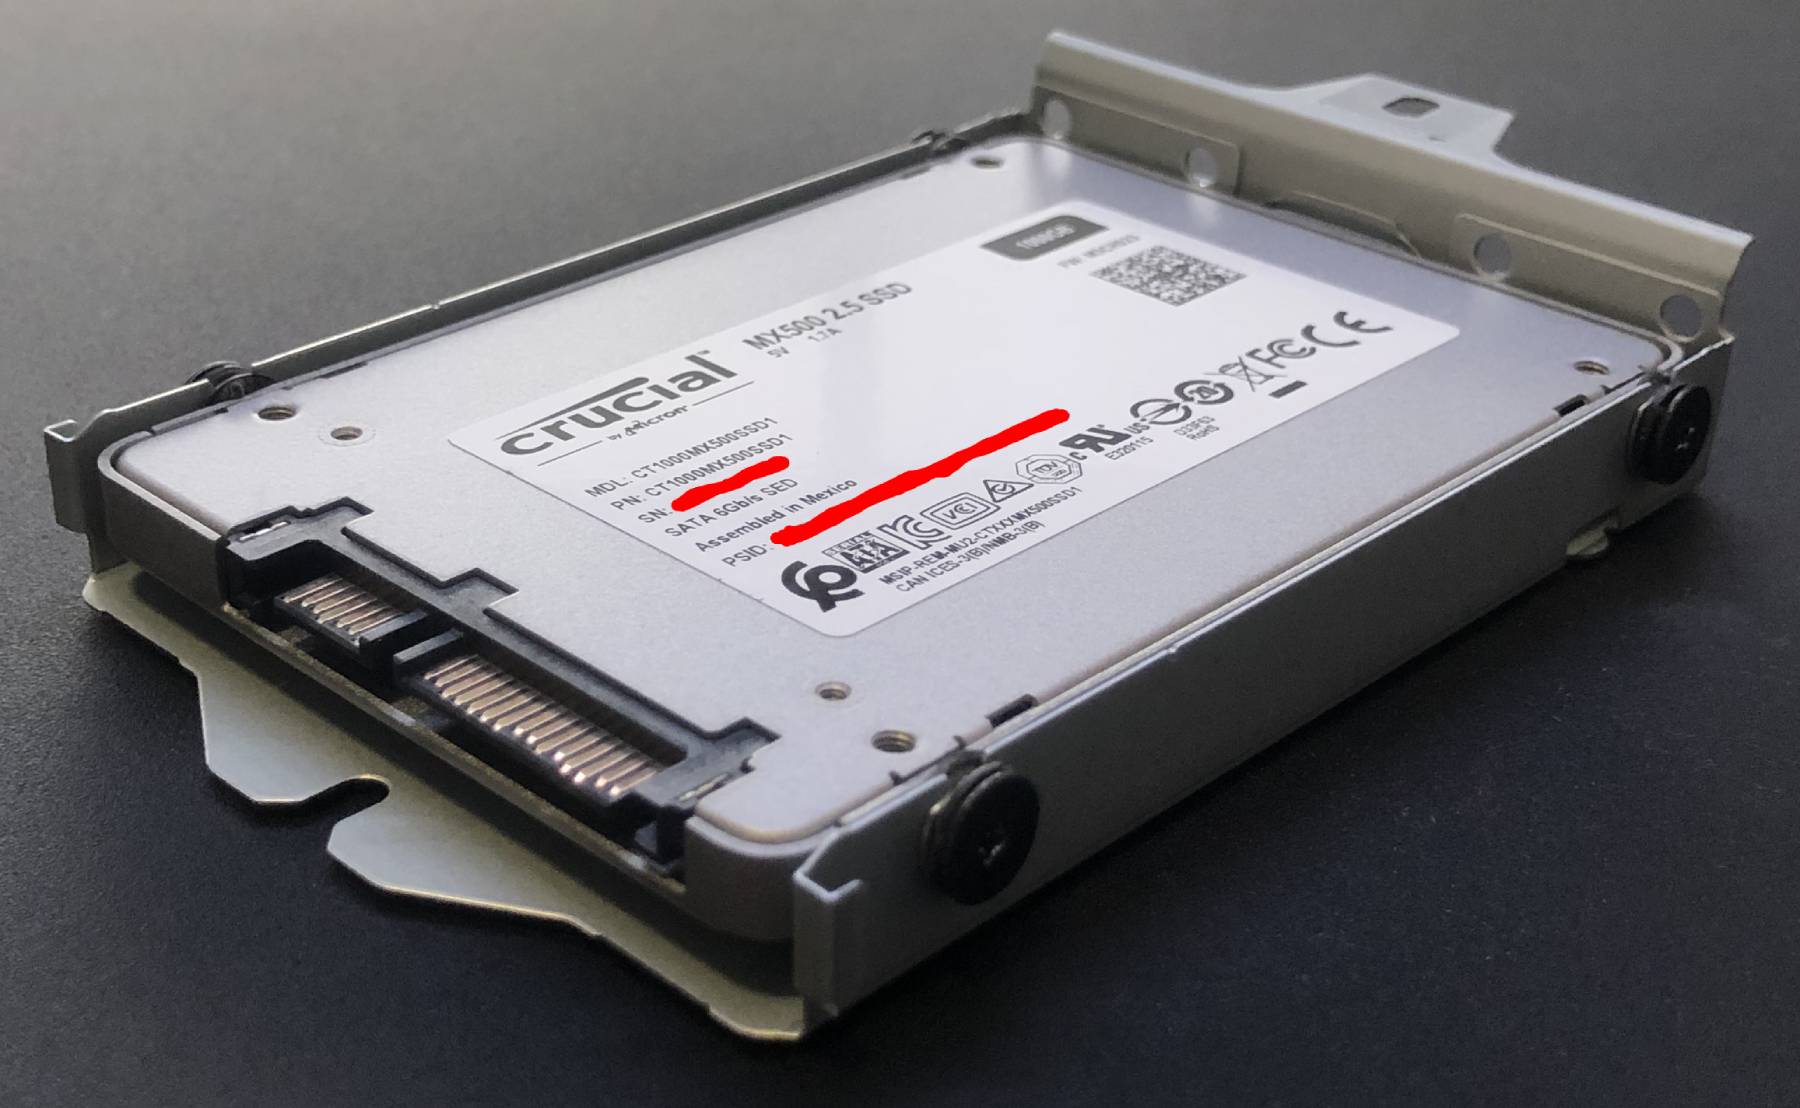
| 1x New SSD or HDD | This is your replacement drive to be installed. I went with a Crucial MX500 1TB SSD. |
What drive should you buy?
The PS4 only takes 2.5" drives (no more than 9.5mm in height). These drives are typically sold as laptop drives.
As my upgrade was to an SSD, I purchased a Crucial MX500 1TB 2.5" SSD. This cost approx $140 AUD (~$85 USD before taxes)
Step 1 - Prepare your external drives
External Drive for Backup
To backup your PS4, you will need an external hard drive large enough to fit the current contents of your PS4.
The external drive MUST be formatted as FAT32 or ExFAT. I formatted my drive as ExFAT.
USB Stick for OS Re-install
You will also need a USB Flash Drive at least 2GB in size. This should be formatted as FAT32. We will use this drive to re-install the PS4's operating system after replacing the drive.
Step 2 - Download the PS4 Operating System
When we swap the drive of the PS4, the OS must be re-installed. We need to download the PS4 firmware from Sony in order to do this.
Sony makes two types of firmware file available: a smaller upgrade file (~445 MB) and a full re-install file (~996 MB). Most guides that I read pointed me towards using the first one, which DID NOT WORK.
Click here to download the PS4 firmware. At the time of writing this post, the latest version is 6.72.
Scroll down until you reach the section:
Update or reinstall PS4 system software using a USB
There are two tabs: 1. Update PS4 system software using USB 2. Reinstall PS4 system software using USB
Select the second one, then click the button to download the firmware file.
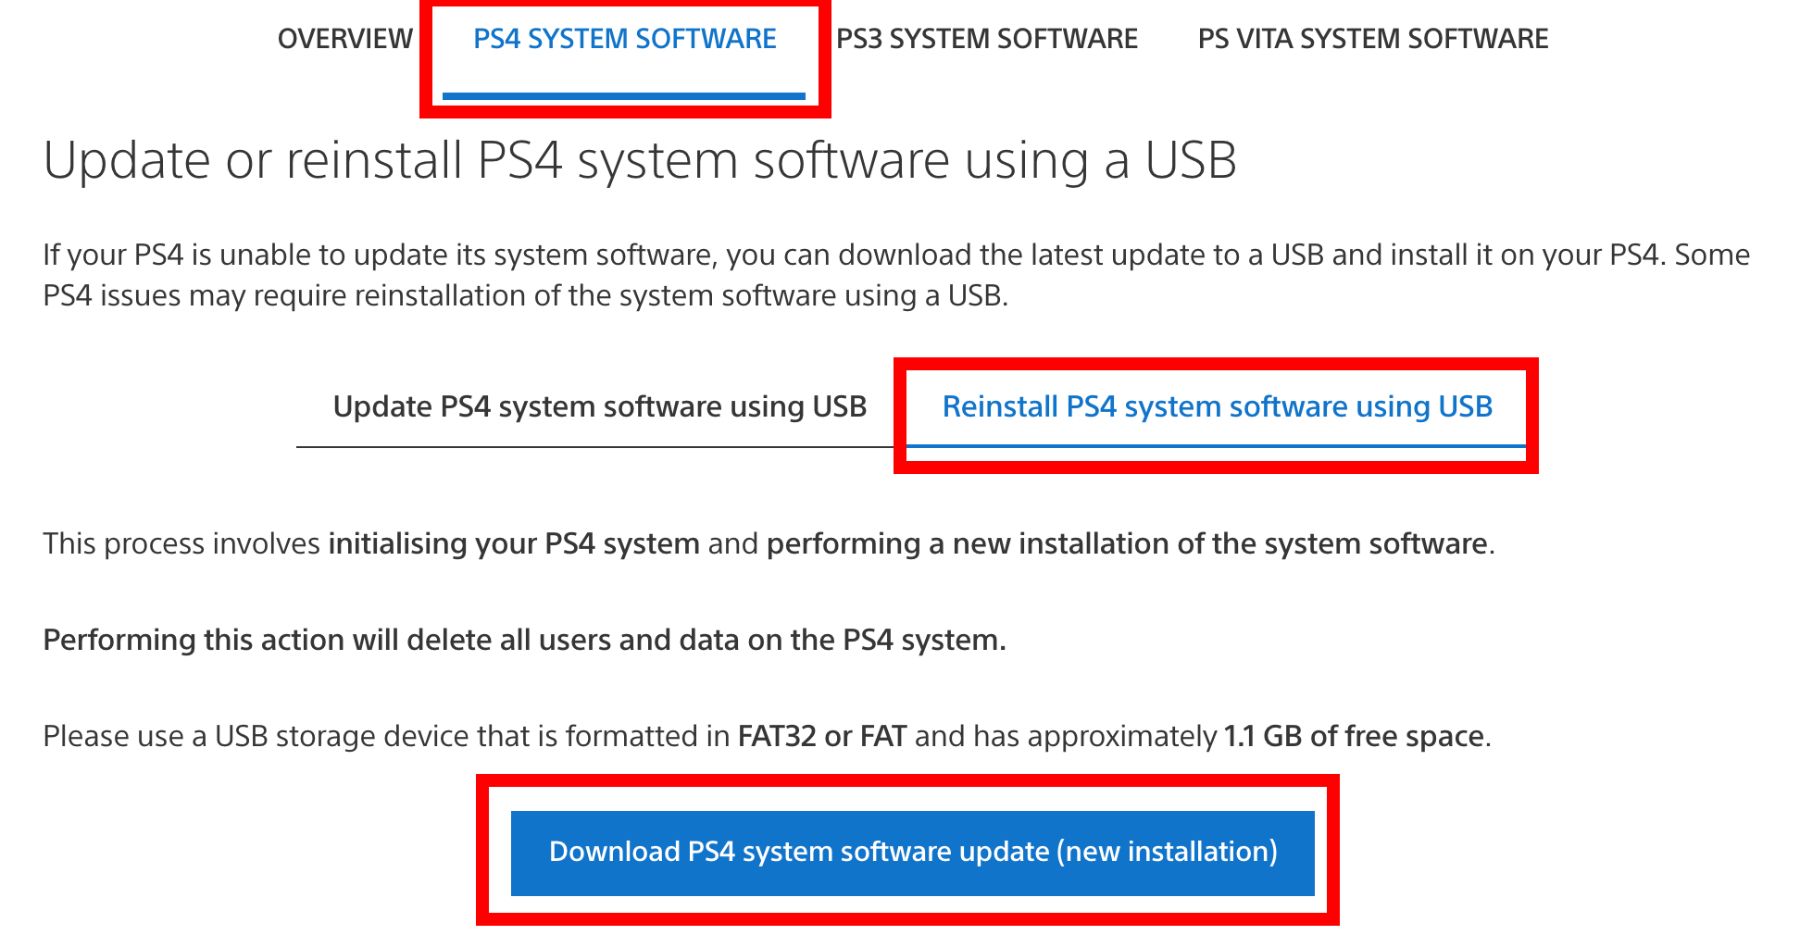
You MUST name the firmware file PS4UPDATE.PUP
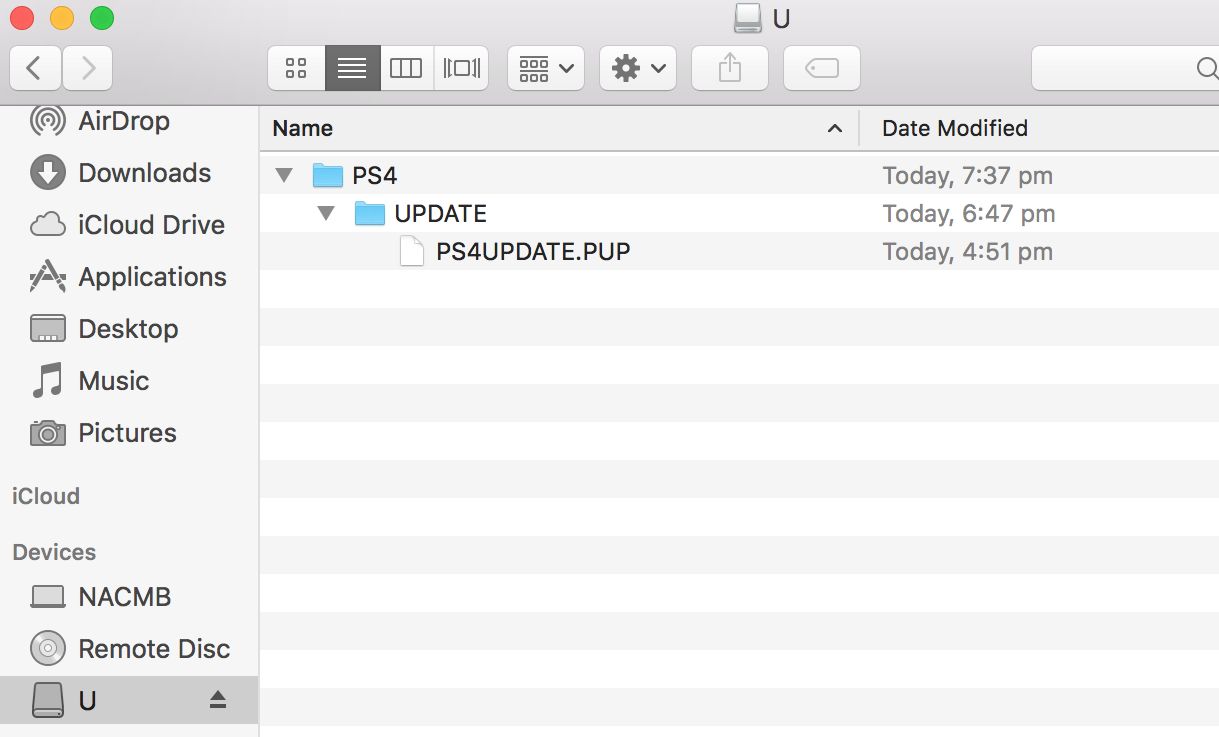
Next, go to the USB Stick you prepared in Step 1. The PS4 will only recognize the firmware file if it is placed inside a special folder structure.
You will need to create 2x folders; one inside the other.
- In the root/base of the USB, create a folder called
PS4. - Inside the
PS4folder, create another folder calledUPDATE
Now copy the PS4UPDATE.PUP file into the UPDATE folder.
The full file path on the USB stick should be: /PS4/UPDATE/PS4UPDATE.PUP
Once you have done this, place the USB stick aside and move onto the next step.
Step 3 - Backing Up the PS4
Before backing up your PS4, you should go through your game library and remove as many installed games as possible. This will drastically reduce the time required to complete the backup and restore processes.
Plug your EXTERNAL drive prepared in Step 1 into the PS4.
On the PS4's menu, navigate to:
Settings > System > Back Up and Restore > Back Up
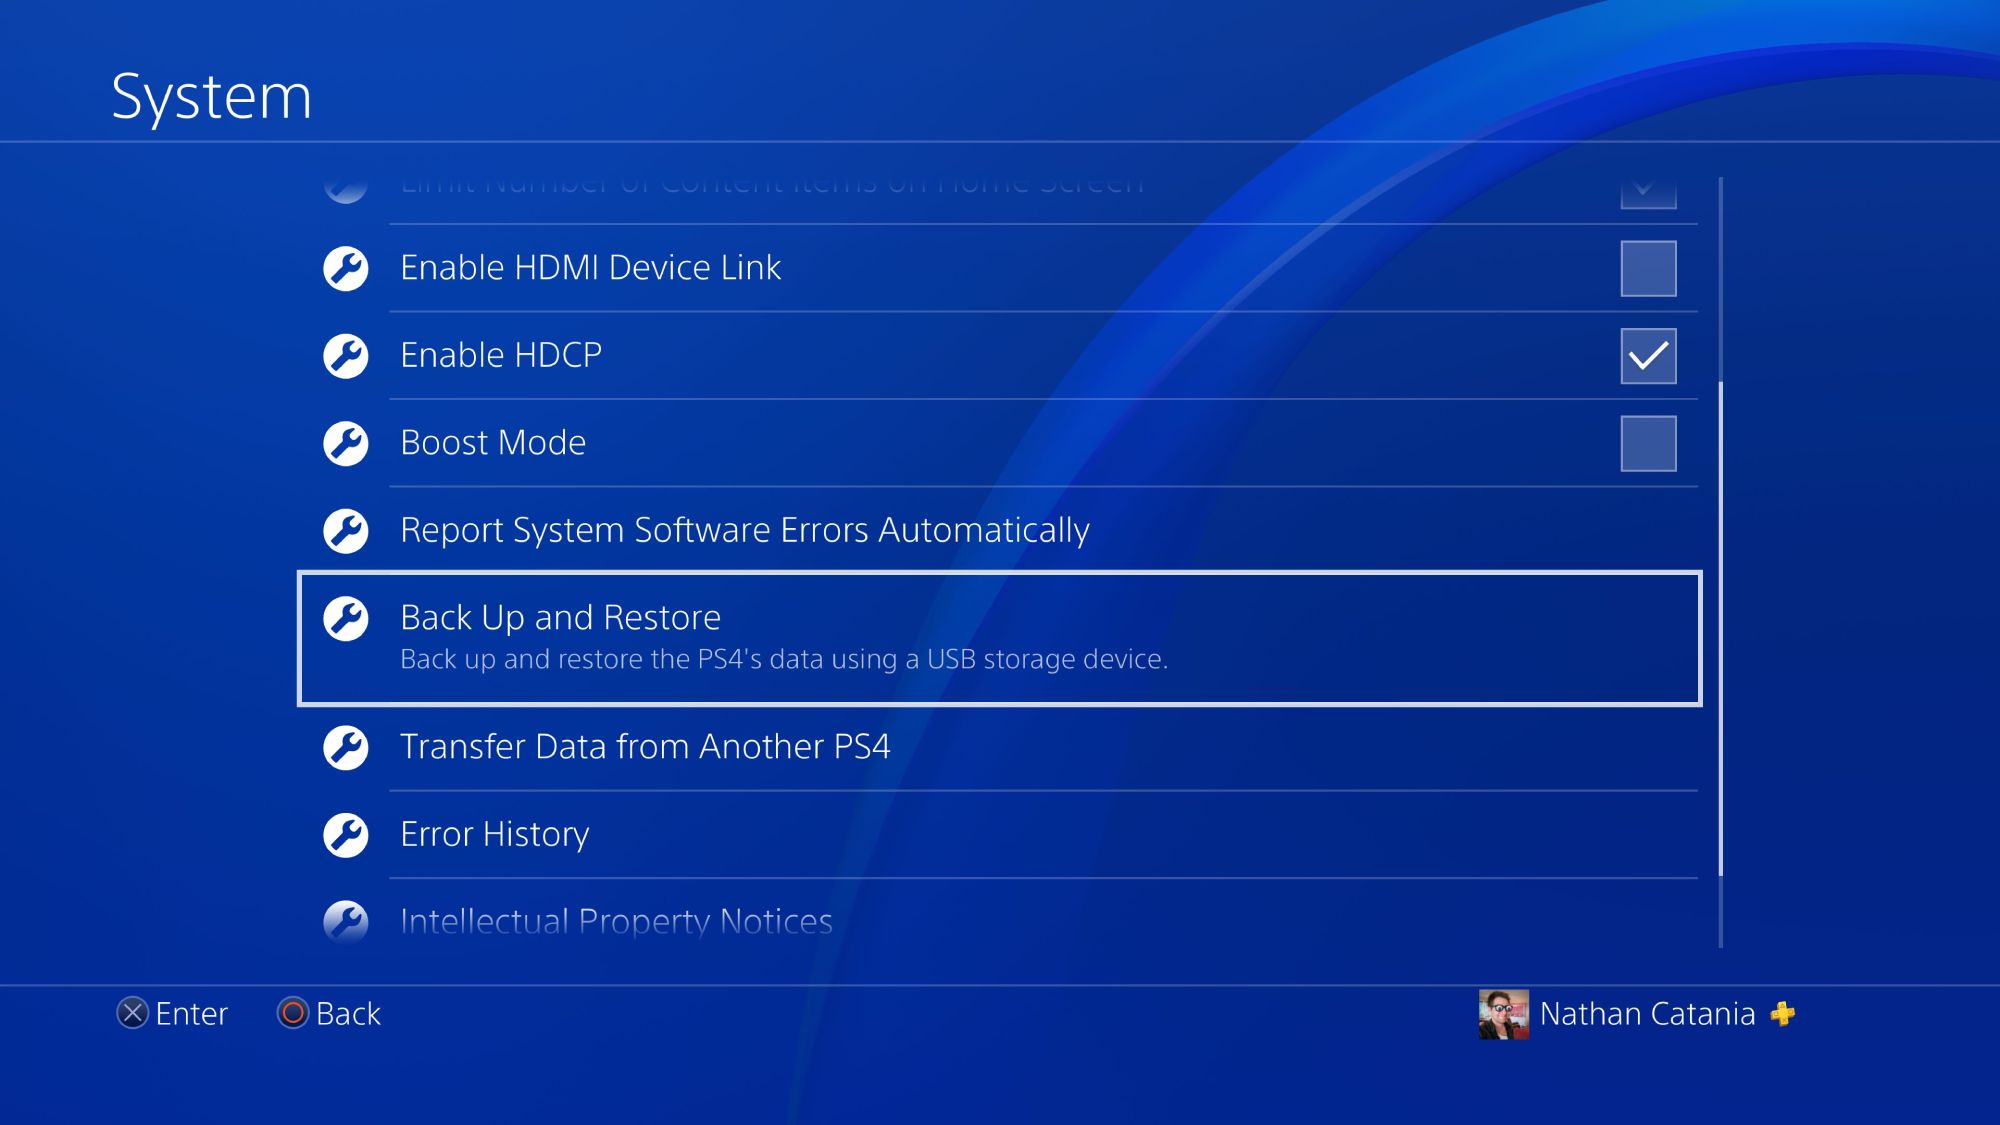
The PS4 will ask you what you want to backup. Everything will be selected by default. If your external drive was formatted correctly, the PS4 will display the amount of free space on the drive. I ticked everything then clicked Next.
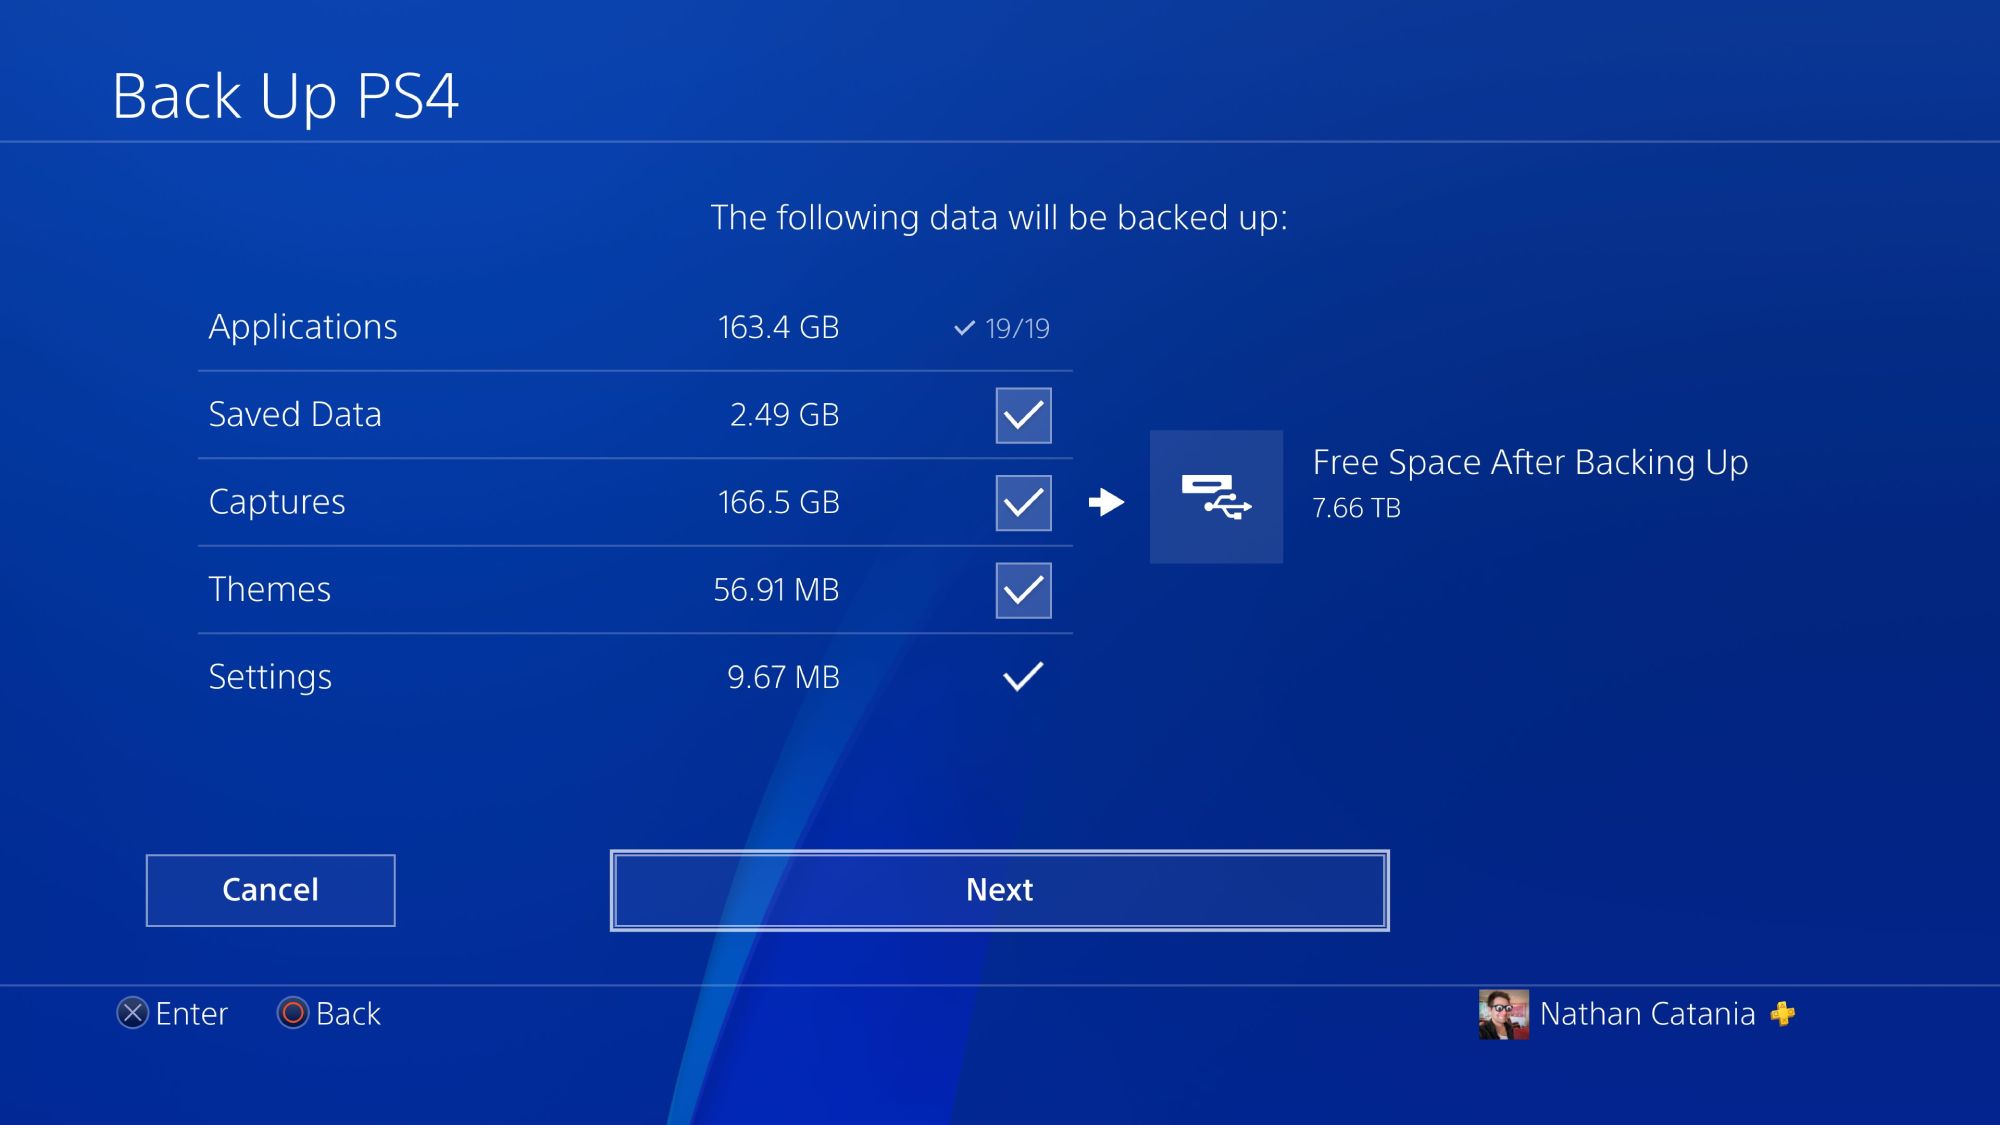
If your drive cannot be used, the "Next" button will be greyed out and the drive will display no usable free space. In this case, check that your drive has been formatted correctly. If you are using FAT32, try formatting as ExFAT instead.
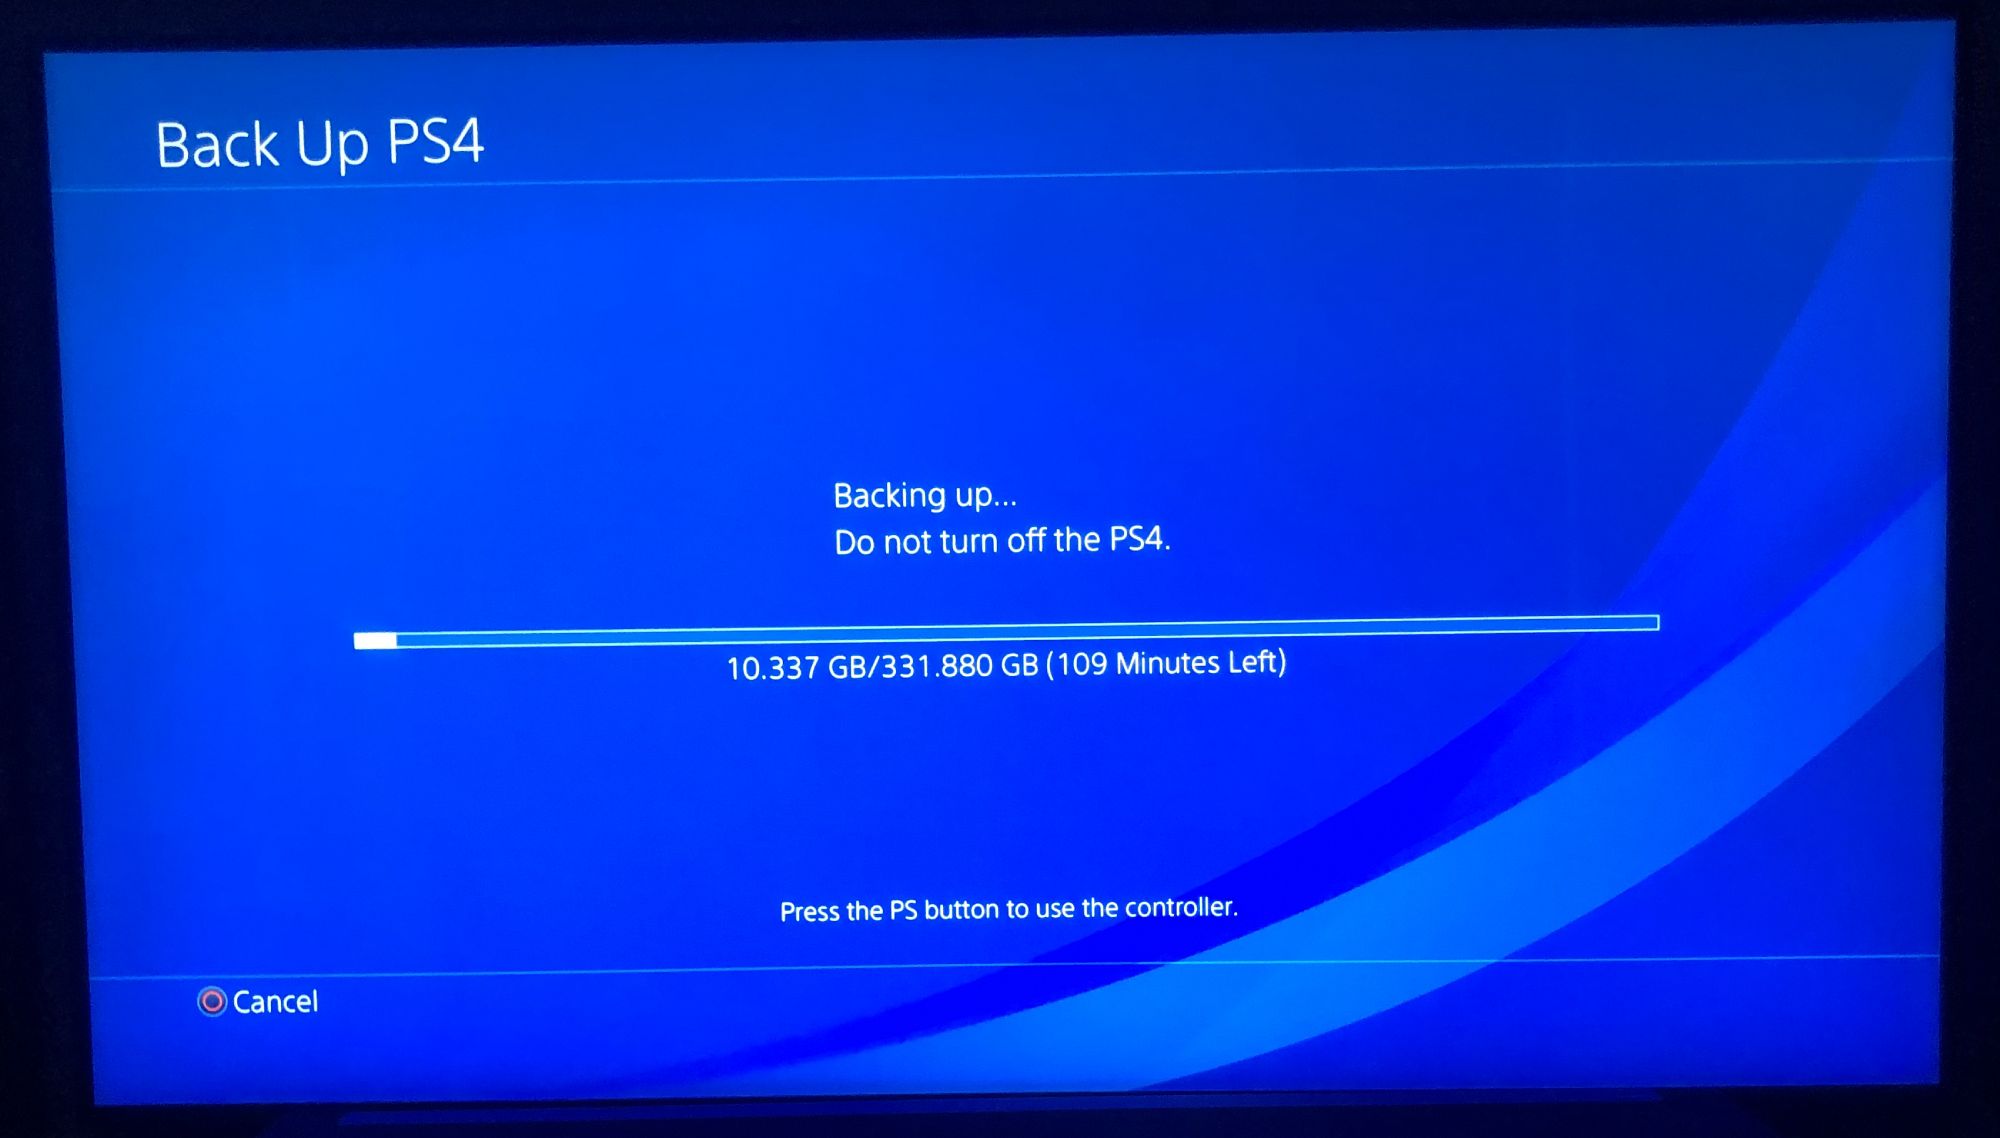
Once you click "Next", the backup process will begin. Initially the PS4 will estimate a massive amount of time to complete the backup (like 8 hours), but it will slowly adjust and decrease.
My backup of 332GB took about 90-100 minutes all up.
Step 4 - Shutdown the PS4
Once the backup process has finished, completely Power Off your PS4. Do NOT put it into Rest Mode - it needs to be completely shut down.
Once it has been powered off, unplug the console completely and move it to a desk or table: It is time to replace the drive.
Step 5 - Accessing the PS4 HDD
This step will be different depending on the model of PS4 you have. The location of the HDD bay is different across models.
My PS4 is the Pro model.
Sony has model specific instructions here.
On the back (or side) of the PS4, look for a removable panel.
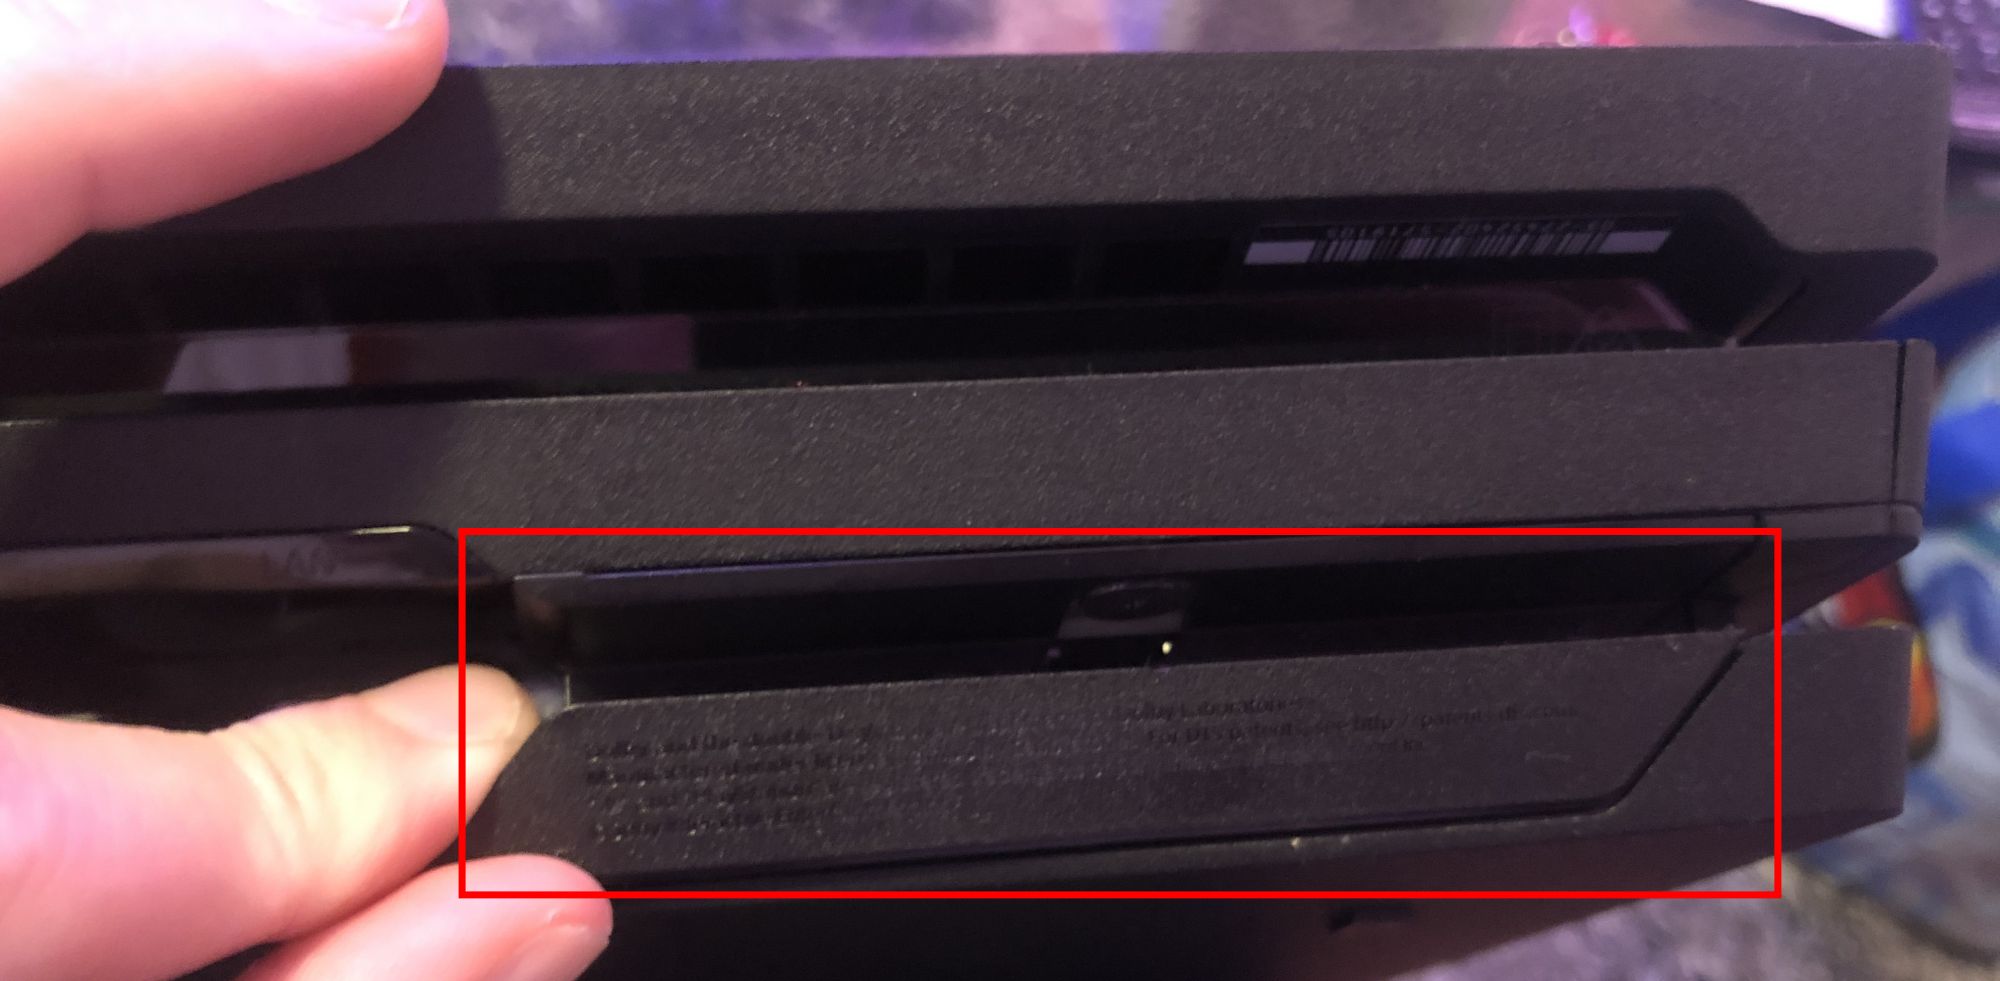
This may require a bit of force to pry away from the console. Doing so will expose the drive tray.
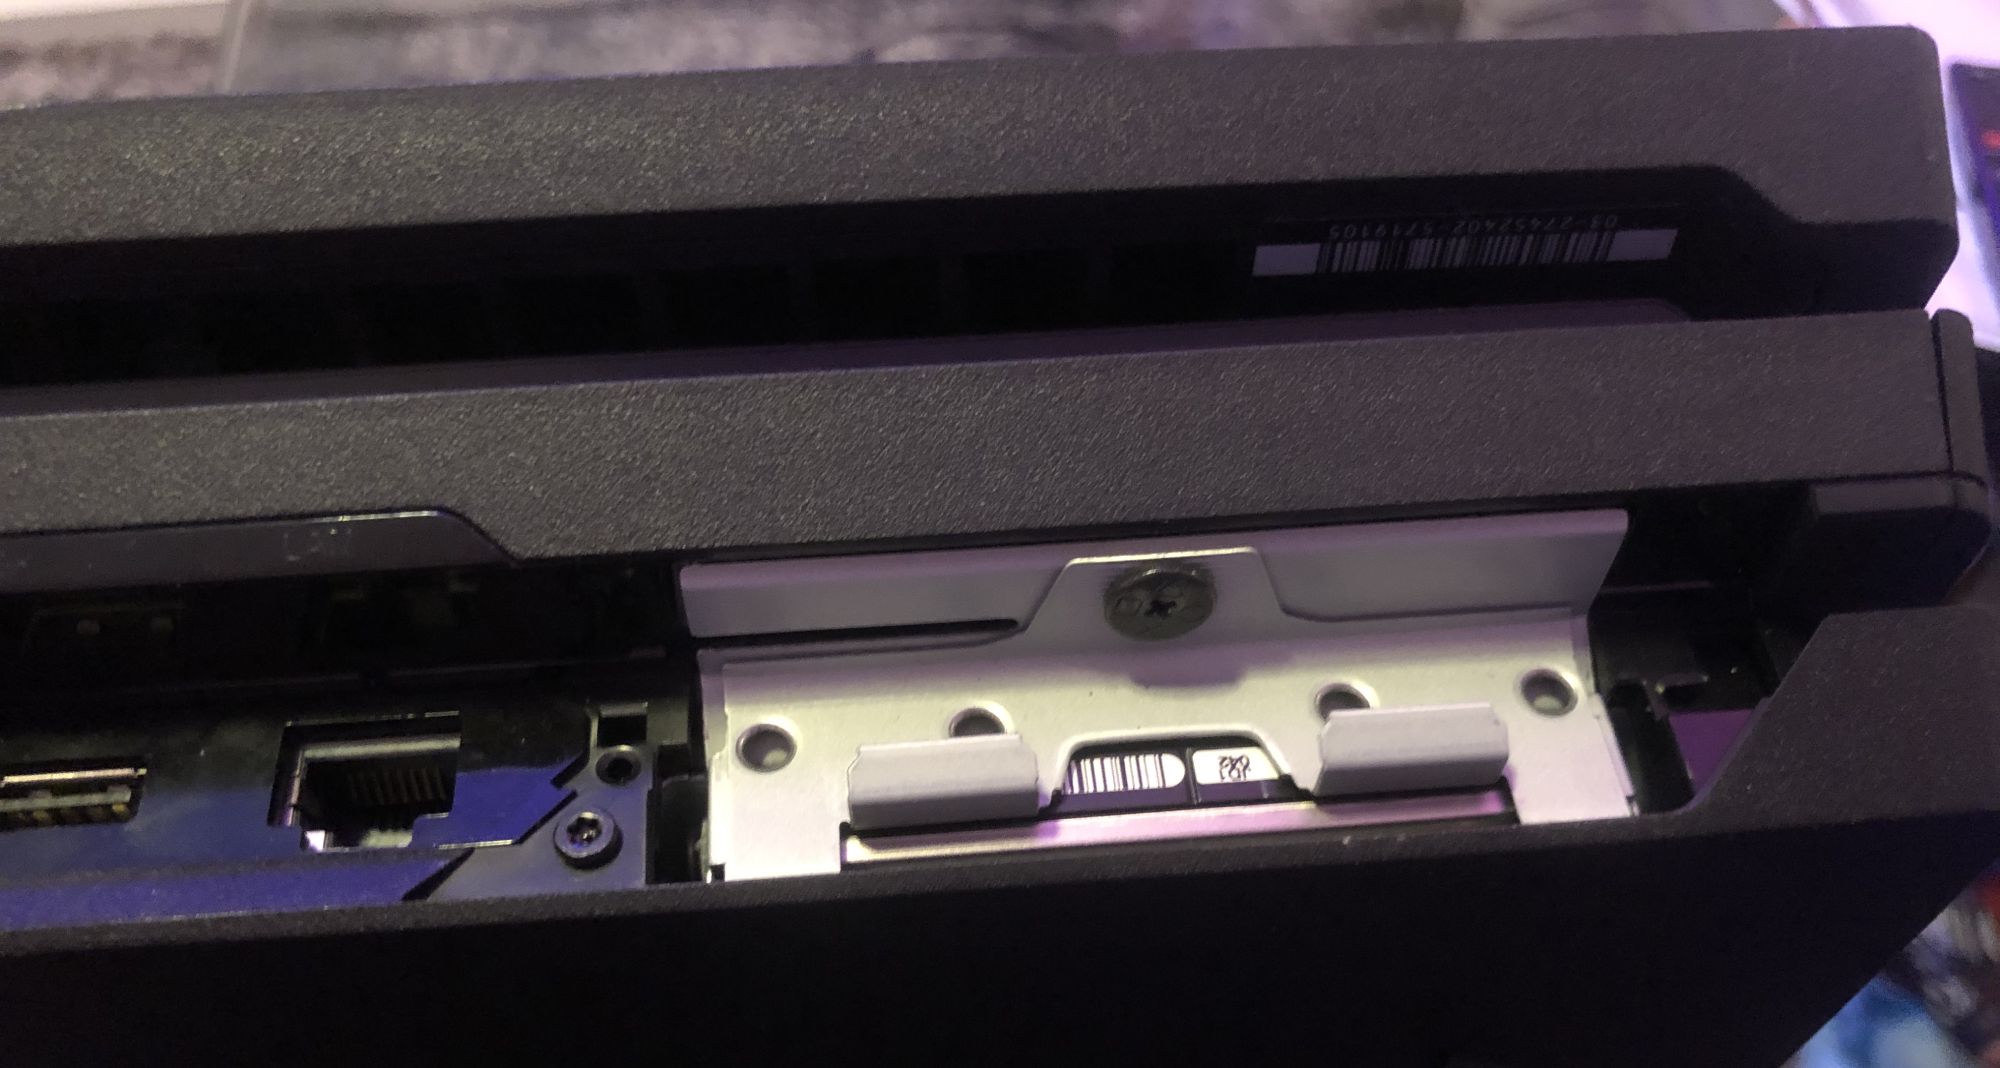
Using your small Phillips head screwdriver, remove the screw securing the drive tray in place. The tray should slide out towards you..
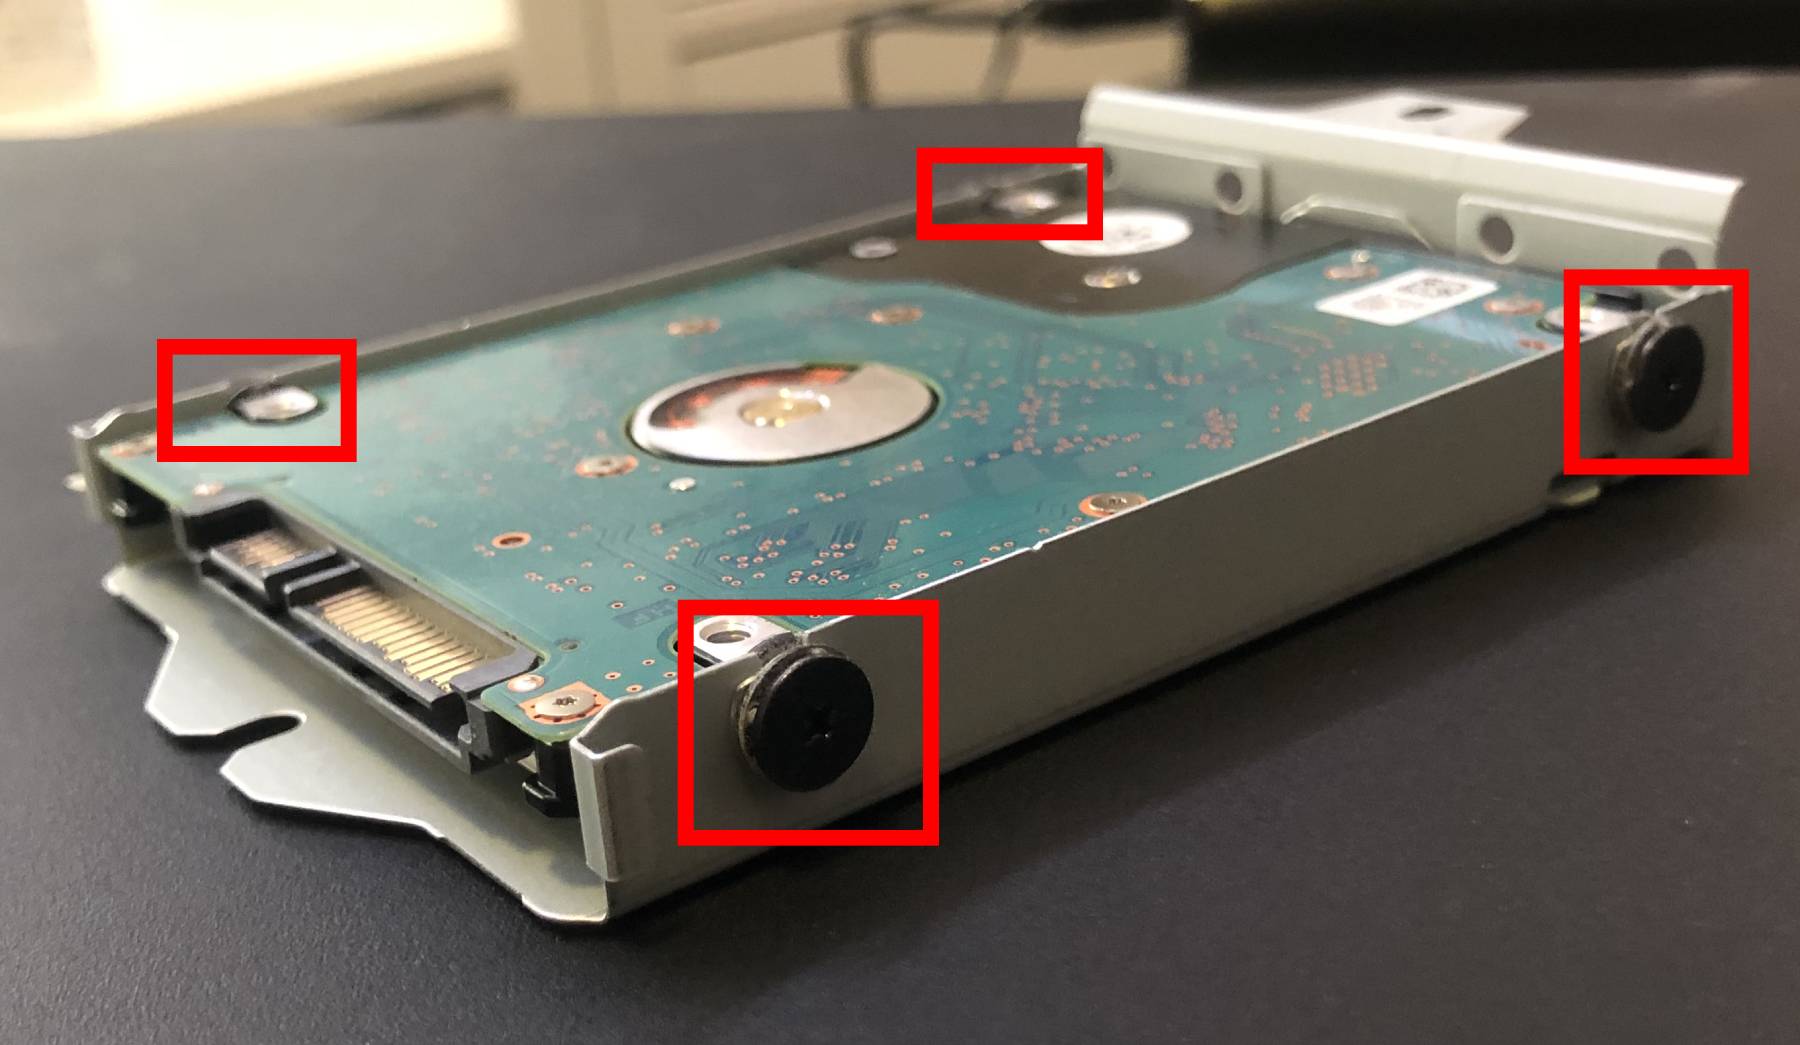
The picture below shows the removed tray with the old HDD in place. The drive is secured in the tray by 4 screws: 2 on either side of the tray. Remove these screws to remove the drive.
Note that bottom of the drive faces upwards when placed into the tray.
The empty tray, the old HDD, and the new SSD to be installed:
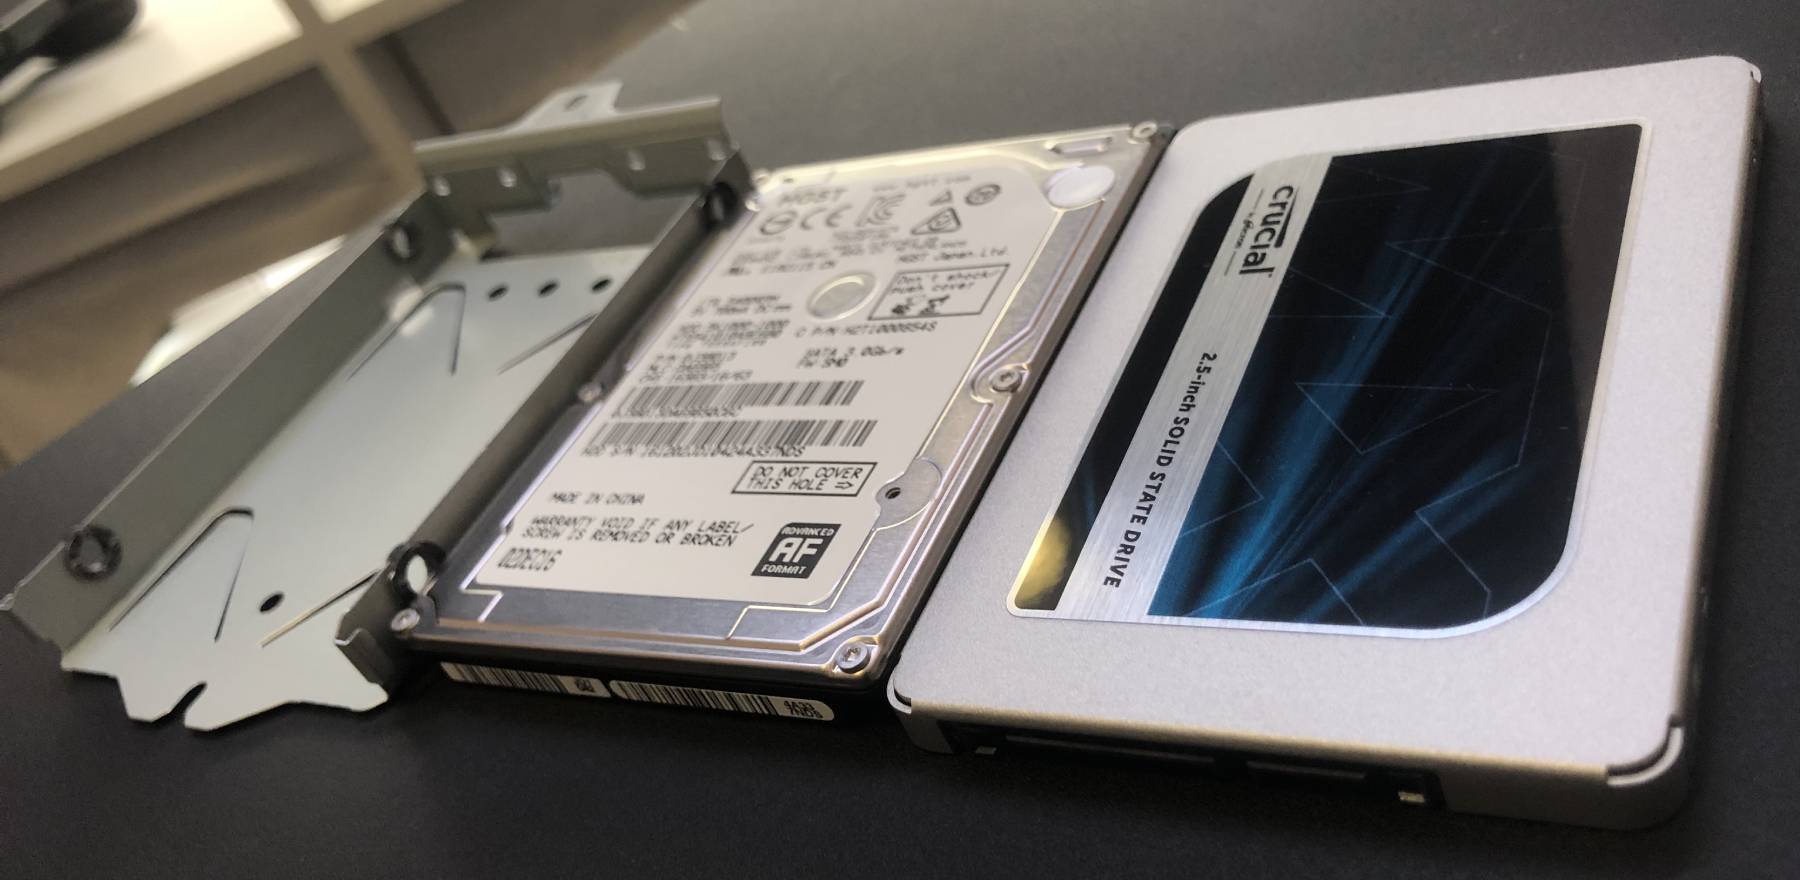
Place the new drive/SSD into the tray with the bottom of the drive facing upwards.
WARNING: If the new drive is not placed in the correct orientation, it will not slide back into the PS4, and you risk damaging the connector.
Secure the drive with the 4 screws you removed earlier.
Slide the drive tray back into the PS4. It should sit flush the way it did before with minimal force required. If it does not go back in all the way, check that you have mounted the drive the correct way up.
Screw the drive bay back into place, and snap the removable plastic cover back on.
Done!
Step 6 - Re-installing the PS4 Operating System
Safe Mode Install
Plug your PS4 back in - do not power it on just yet.
Insert the USB stick containing the PS4 Firmware File you downloaded in Step 2.
Power on the PS4.
The PS4 will boot into Safe Mode. This is OK and normal.
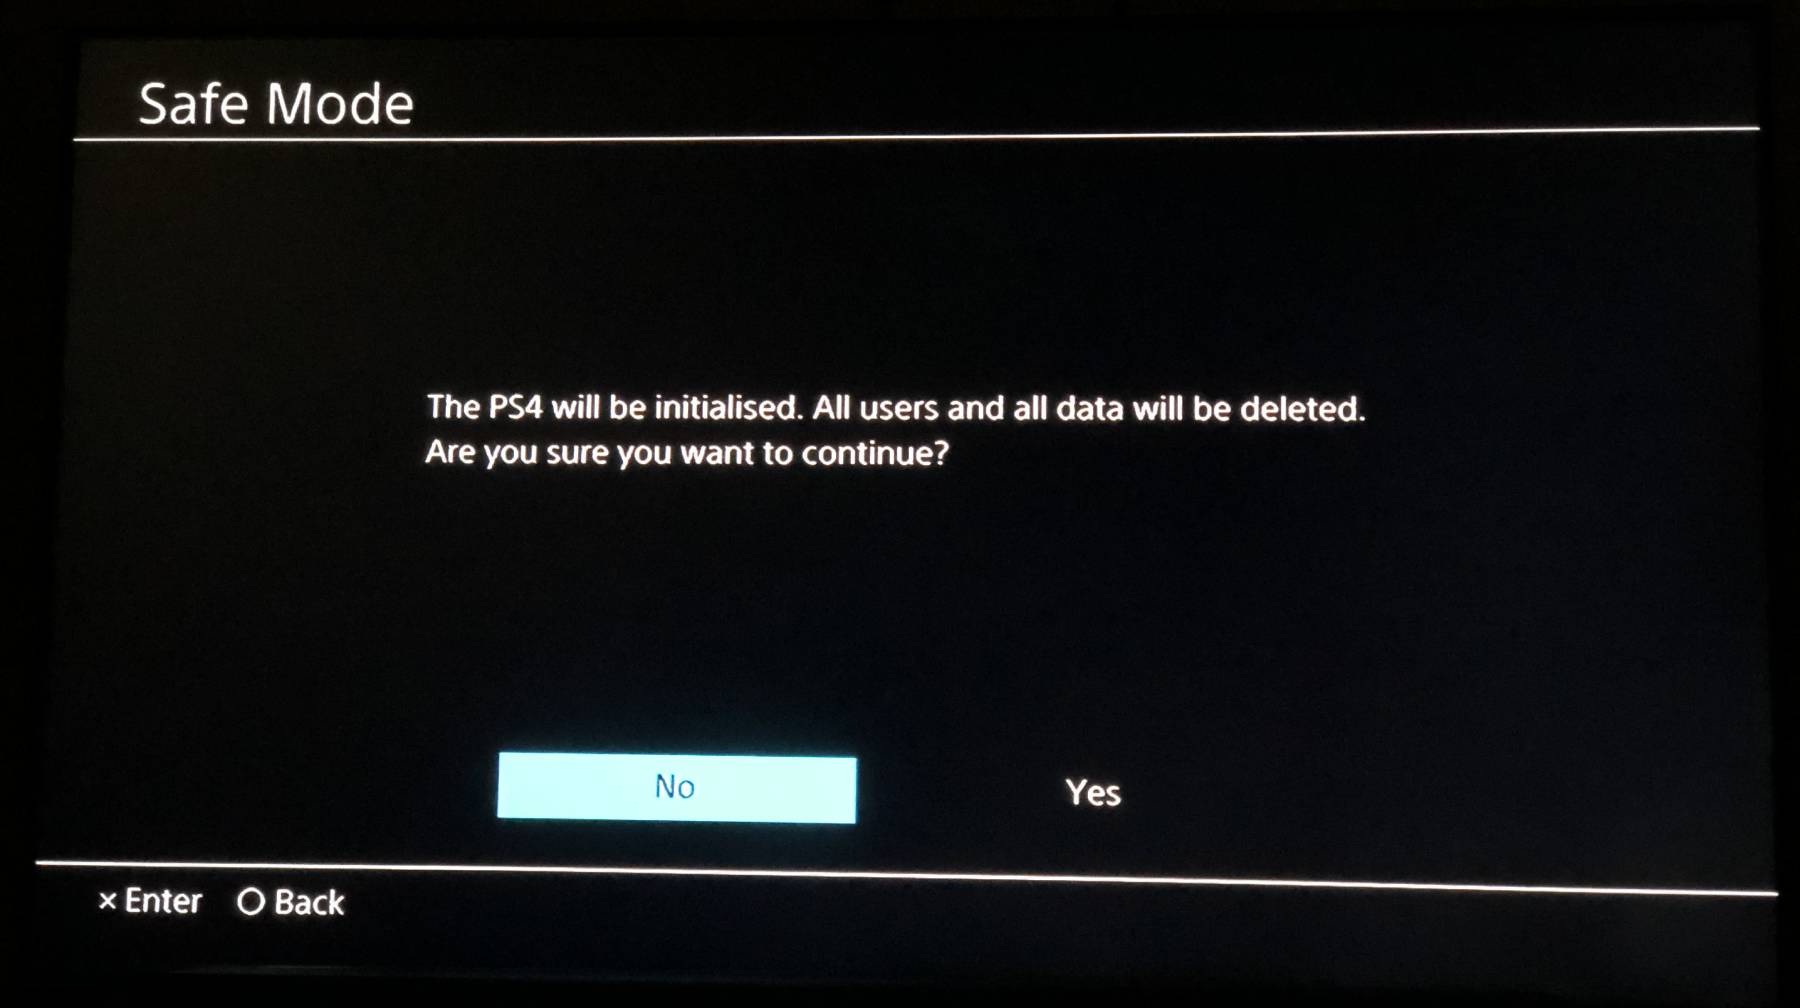
If your USB was configured correctly and you downloaded the correct firmware file, the PS4 will prompt you to initialize the system and re-install the OS.
Proceed. The software will install and your PS4 will reboot.
If there is an issue with your USB stick or the firmware file, the PS4 will give you an error like the following:
The update file cannot be used.
Connect a USB storage device that contains an upgrade file for reinstallation for version [VERSION] or later.
(CE-34788-0)
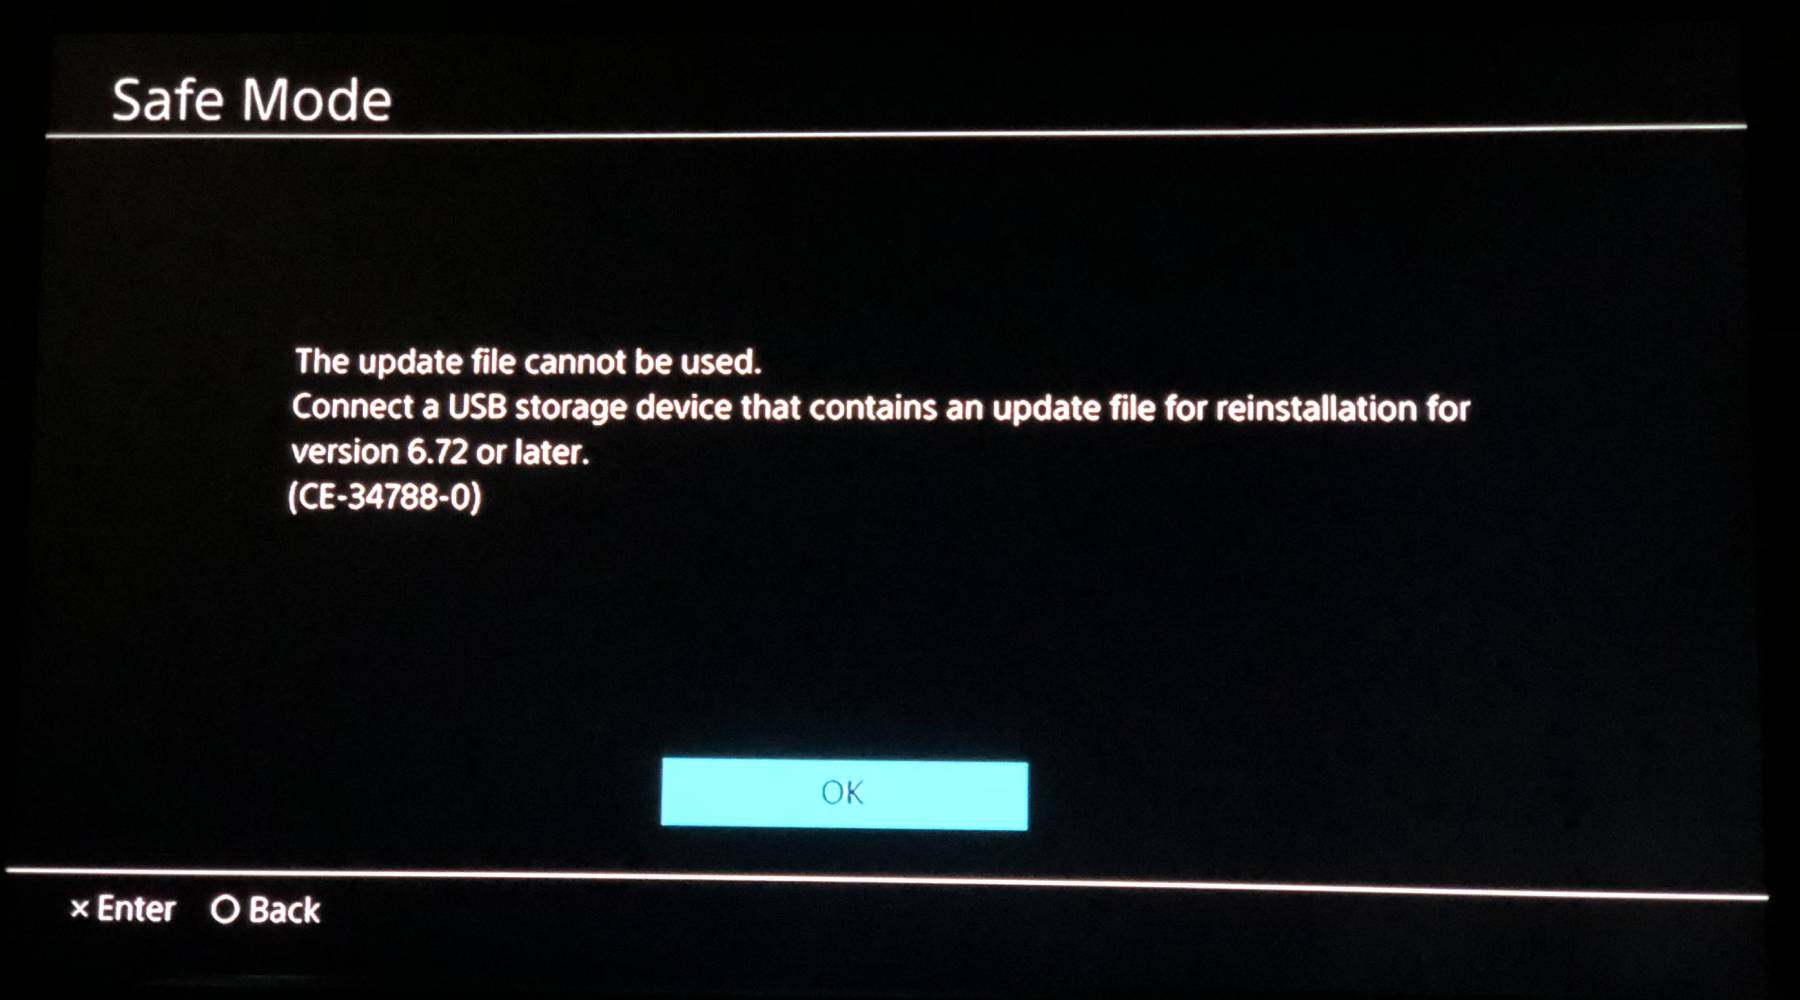
If this happens to you, the fix is usually quite trivial:
- Check your USB is formatted correctly as FAT32. Alternatively, try a different USB stick.
- Check your folder structure is correct. The PS4 firmware file should be inside a folder called
UPDATE, which itself should be in a folder calledPS4. ThePS4folder should not be within any other folder and should be located in the root of the USB. - Check your USB does not have multiple partitions. If you don't know what this is, you should be OK.
- Check the PS4 firmware file is named correctly:
PS4UPDATE.PUPIt must be called this EXACTLY. - Make sure you downloaded the correct firmware file! You want the larger firmware file intended for re-installs, not the smaller firmware file for upgrades.
System Initialization
Once the install finishes, your PS4 will reboot to a "Welcome" screen and will prompt you to setup the PS4 from factory-default settings. Follow the prompts until you get to the PS4 menu.
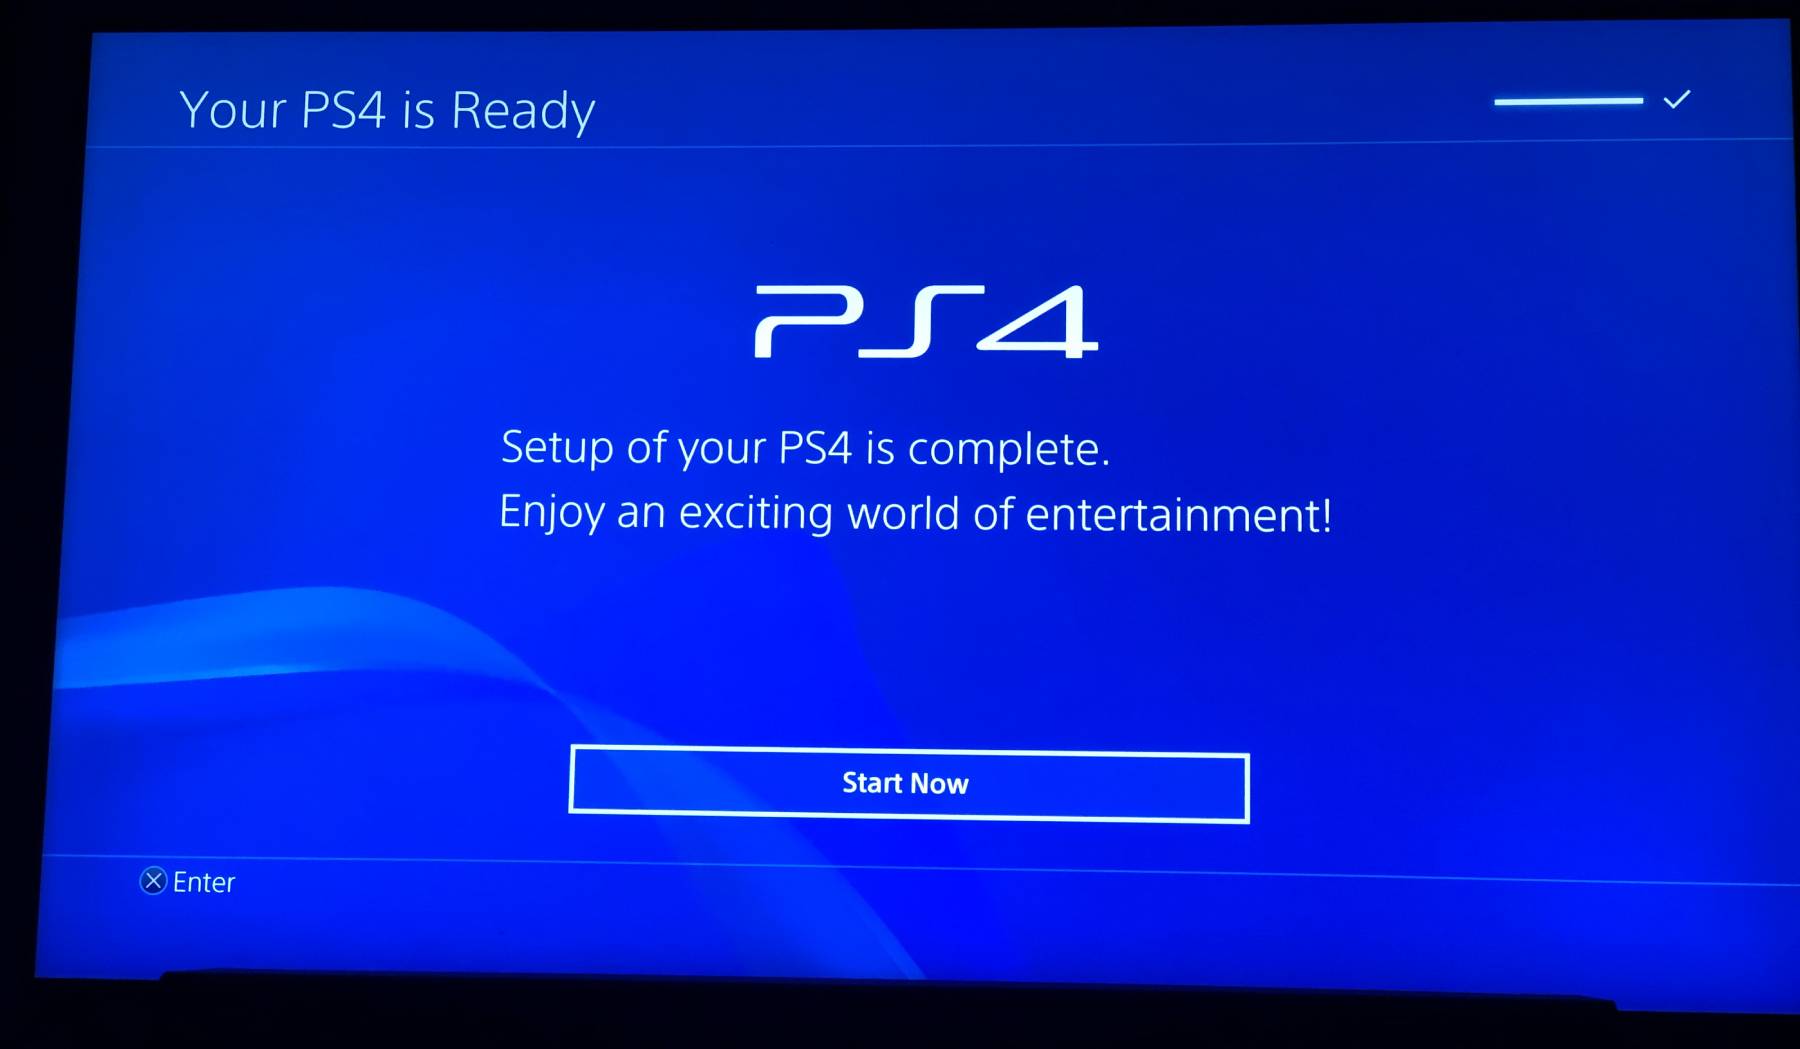
Don't bother signing into PSN. Instead, we are going to restore all of your content in the next step.
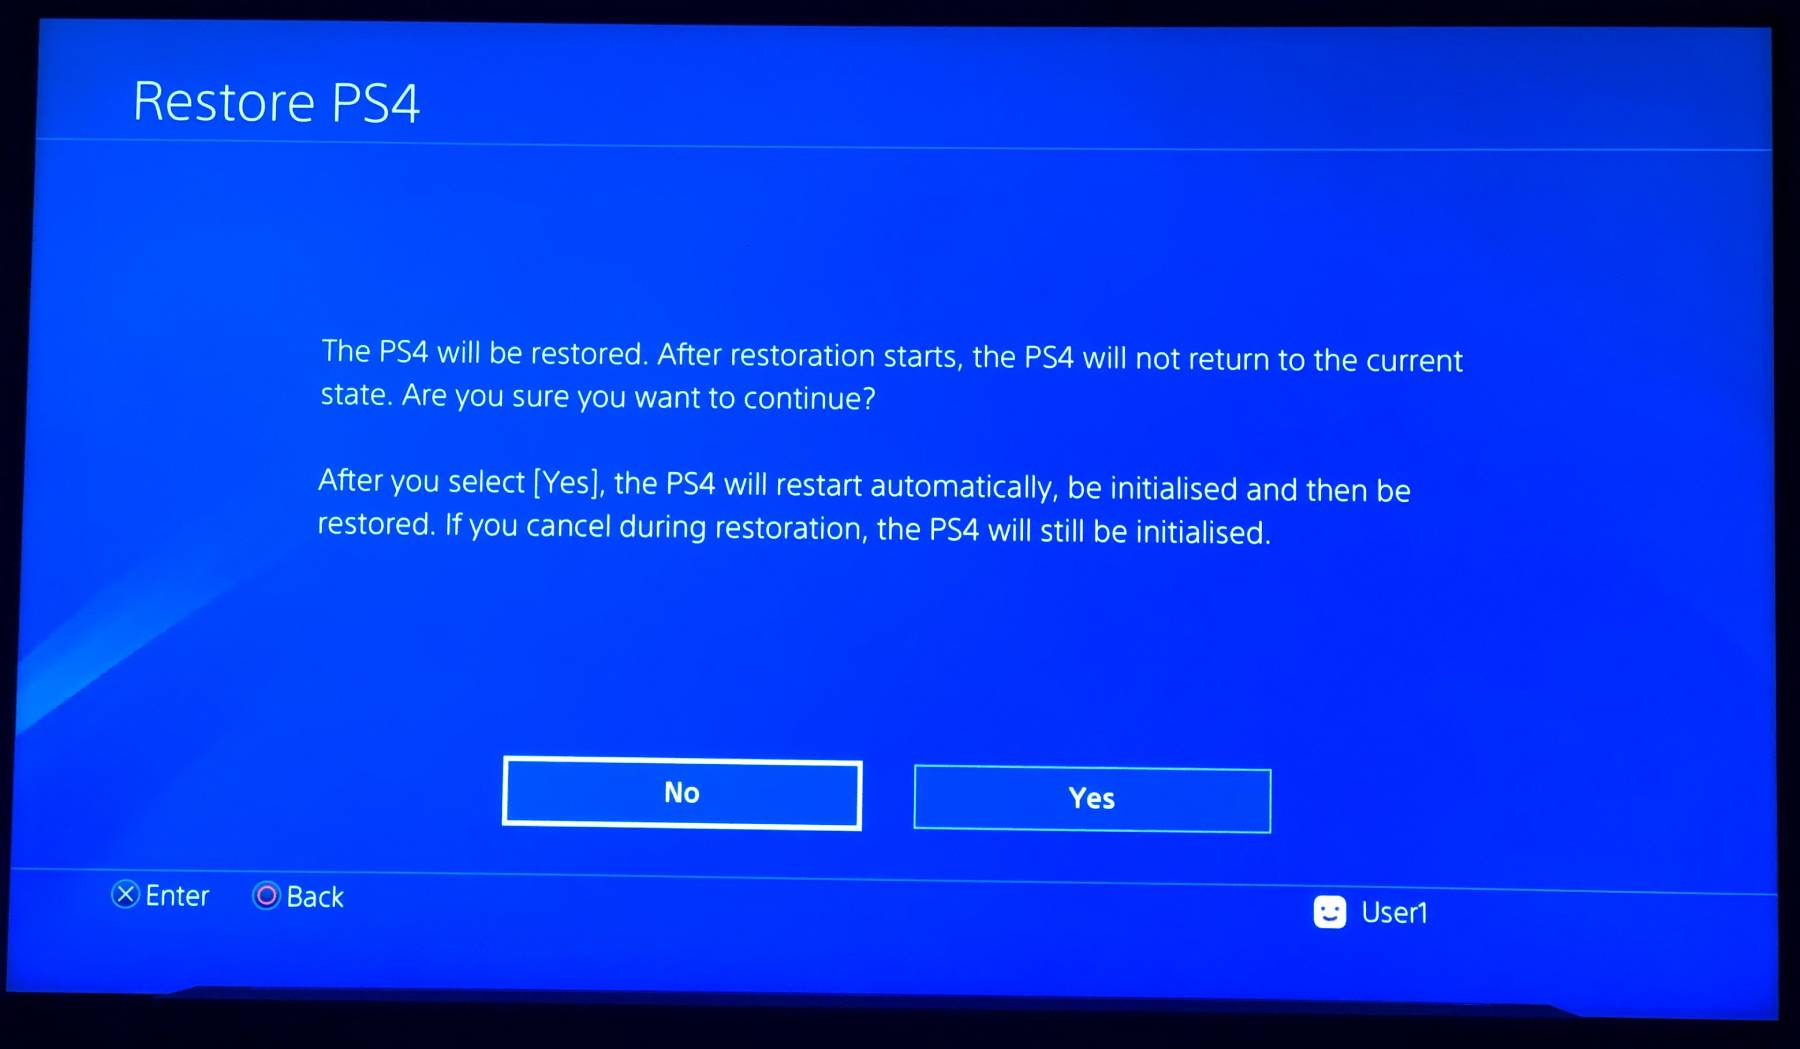
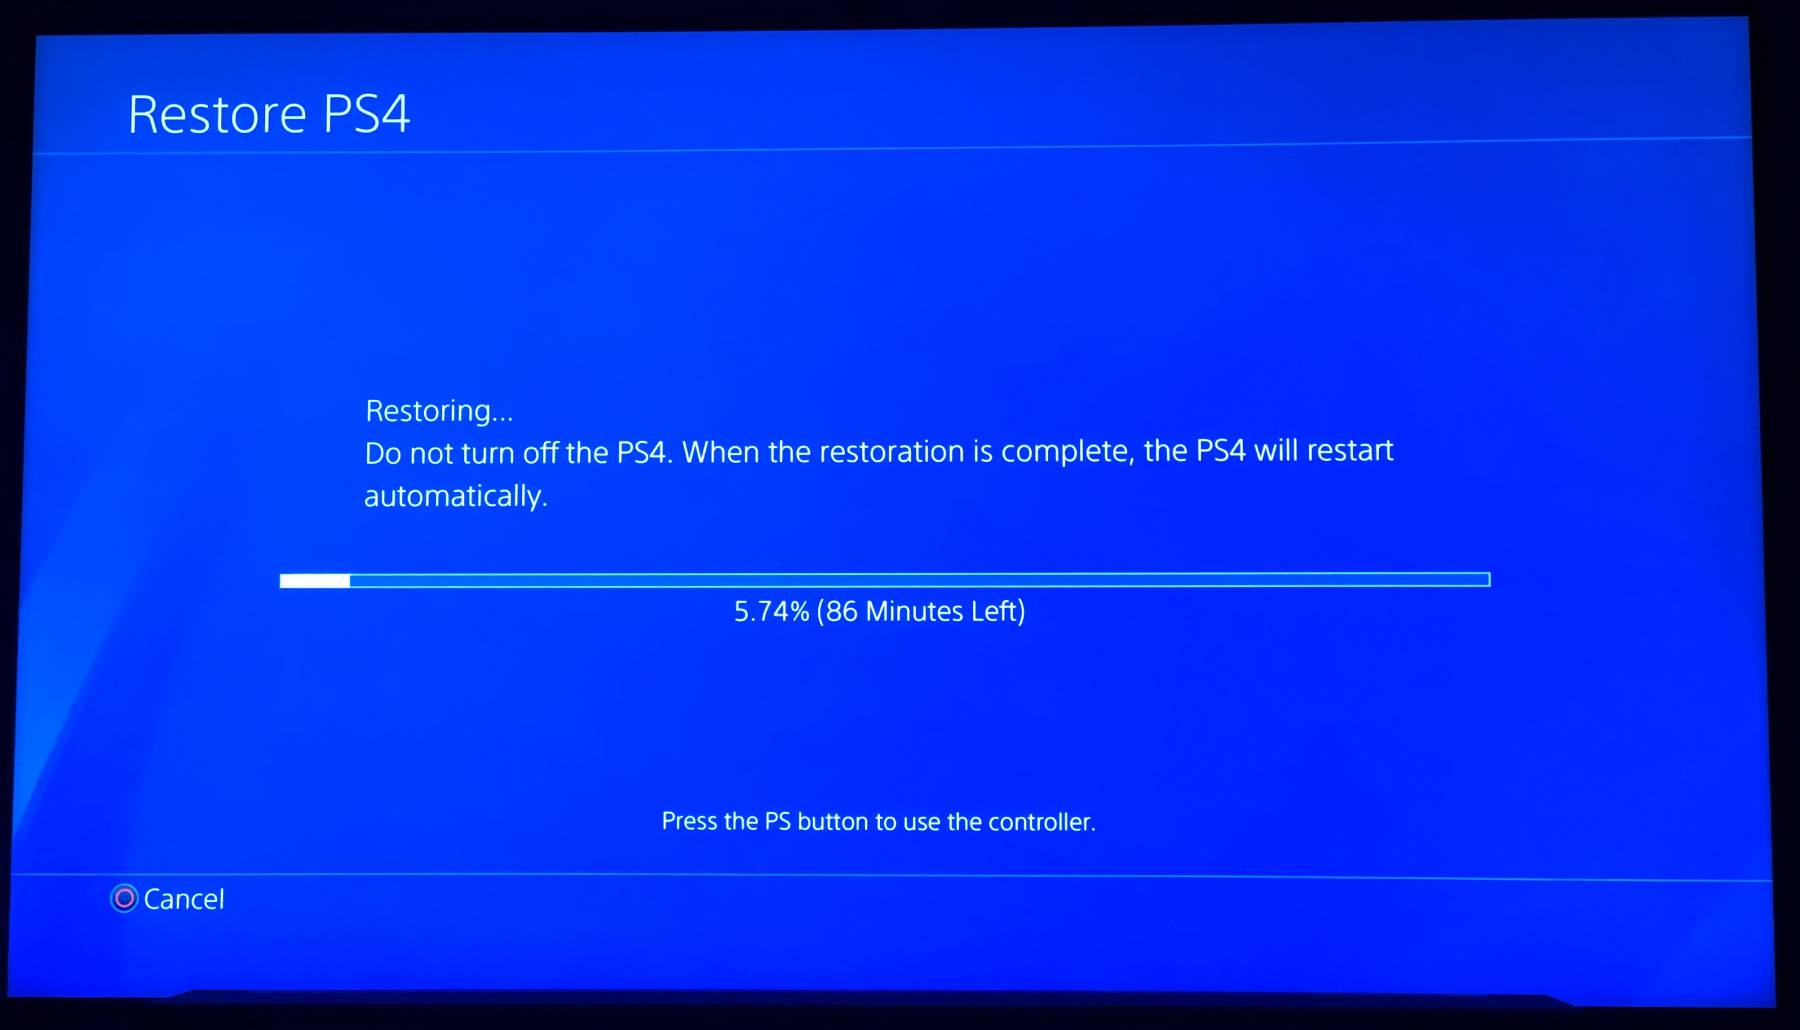
Step 7 - Restoring the PS4
Congratulations, your new drive should be working nicely! We're now going to restore all of your content that we backed up earlier.
First, plug in your EXTERNAL hard drive that was used for the PS4 backup.
Navigate to: Settings > System > Back Up and Restore > Restore
Follow the prompts. You may get a message that your PS4 will initialize itself (again) before starting the restore process. This is OK. Proceed.
{% include image.html path="2019-08-16/restore1.jpg" path-detail="2019-08-16/restore1.jpg" alt="Starting the Restore process" %}
Like the backup process, the restore process can take quite some time. My data was restored in about 110 minutes.
Once the restore is completed, your PS4 will reboot. You may be asked some questions similar to the initialization process earlier. Don't panic. All of your data is OK.
Your PS4 should launch to it's menu with all of your games, content and data restored.
Finish
Well done you are finished! Enjoy your new drive. If you installed an SSD - enjoy the faster load times.
While the improvement isn't as profound as it would be on a PC, I found the PS4 menu itself to be a fair bit smoother.
Testing with Destiny 2, I noticed (on average) a ~50% reduction in load times across the majority of activities. YMMV of course.