Connect Juniper Sky Enterprise to Aerohive HiveManager
Introduction
Juniper Sky Enterprise is a neat little application that can manage and provision SRX, EX, and NFX series products from Juniper Networks. Sky Enterprise also allows you to monitor (but not configure) any Aerohive APs that you have deployed, however the documentation on how to do so is hidden away on the OneConfig website.
This post will walk through the process of adding your Aerohive APs to your Sky Enterprise inventory.
In short:
- To link Sky Enterprise and HiveManager, we need to give Sky Enterprise an Owner ID and API Authorization Token from HiveManager. This allows Sky Enterprise to utilize HiveManager's API to pull information about your APs.
- You can generate API tokens from within HiveManager, but you require a Client ID in order to do so.
- Normally to obtain a Client ID, we would register and create an application at the Aerohive Developer site, however in this case, Sky Enterprise is the application itself that we want to integrate with, so we will use their Client ID.
Let's get started!
Step 1 - Retrieve your Owner ID from HiveManager
Login to Aerohive HiveManager using your existing credentials.
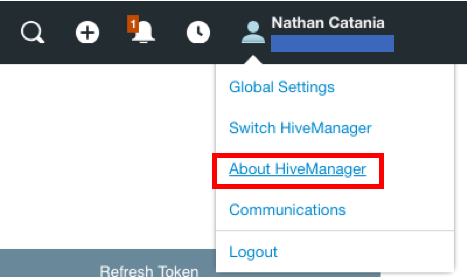
Hover over your name in the top right corner and click About HiveManager
Your Owner ID is also known as your the VHM Id.
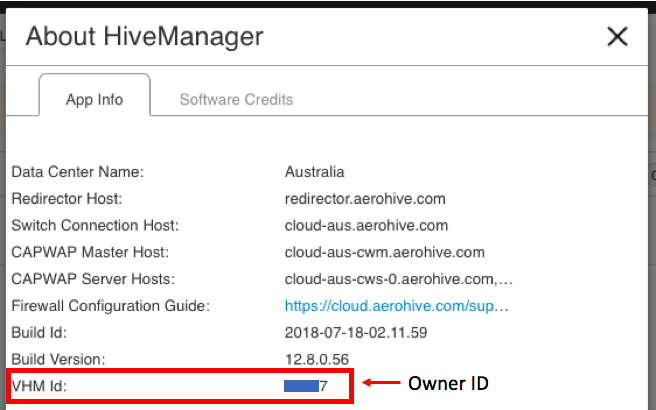
Copy down the VHM Id displayed. You will need this in a later step.
Step 2 - Generate an API Token in HiveManager
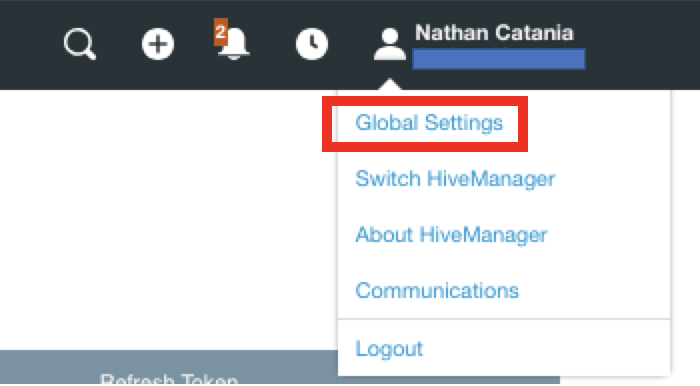
Hover over your name in the top right corner again, but this time click Global Settings
Click API Token Management under API in the menu on the left. Then click the + button to generate a new token.
In the popup, paste in the code e4ba0053.
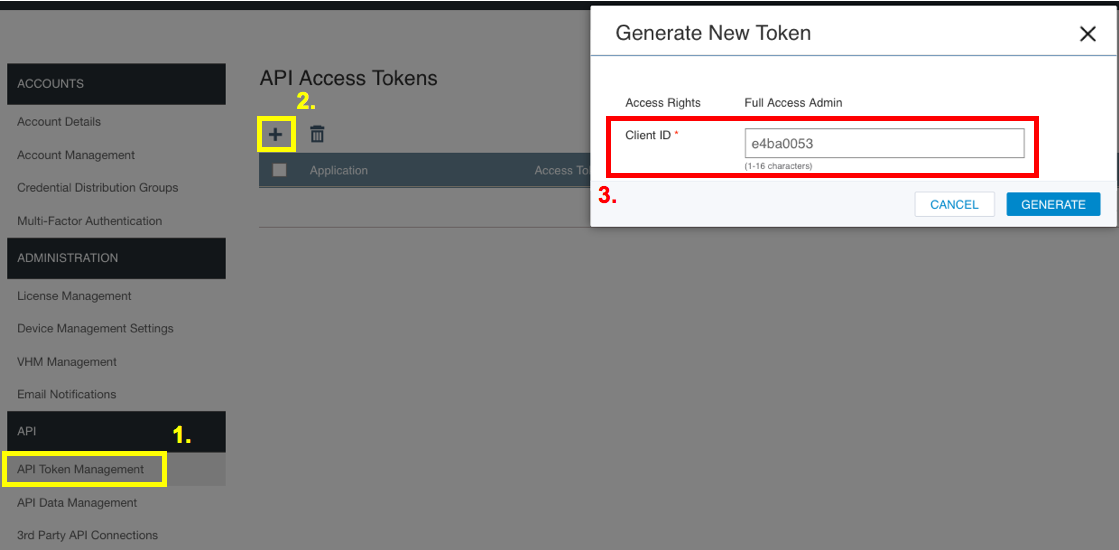
e4ba0053is the Client ID for Sky Enterprise. It is essential that you use this code or else you will run into issues with your credentials later.
Click Generate to create an API Access Token.
Copy down the Access Token displayed. You will need this in a later step.
Step 3 - Get the URL of your HiveManager Region
While browsing HiveManager, note down the URL in use. Copy from the https:// part through to the .com

For example: For the Australian Data Center, the URL to be copied will be:
https://cloud-aus.aerohive.com
Step 4 - Linking Sky Enterprise to HiveManager
Login to Juniper Sky Enterprise using your existing credentials.
Click Settings in the menu bar at the top. Scroll down to the Aerohive option and tick the checkbox.
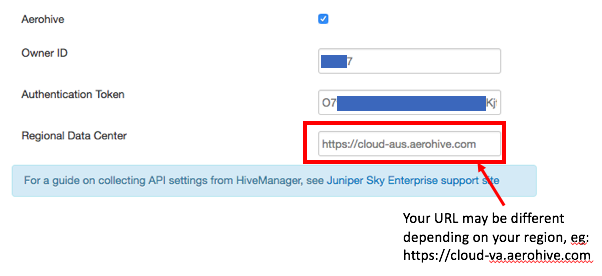
- Copy your
Owner ID(AKAVHM Id) obtained in Step 1 into the Owner ID field. - Copy the
Access Tokengenerated in Step 2 into the Authentication Token field. - Copy the HiveManager URL from Step 3 into the Regional Data Center field.
When you are done, scroll to the bottom of the page and click Update. A green notification from Sky Enterprise will let you know all is well.
If Sky Enterprise responds with an "invalid credentials" message, check that they information you have entered into the fields above is correct.
Step 5 - Verify your Aerohive APs can be viewed in Sky Enterprise
If the above step was successful, you should now have a Wifi APs tab under the Devices menu. This will list all of the APs you have in your HiveManager inventory.
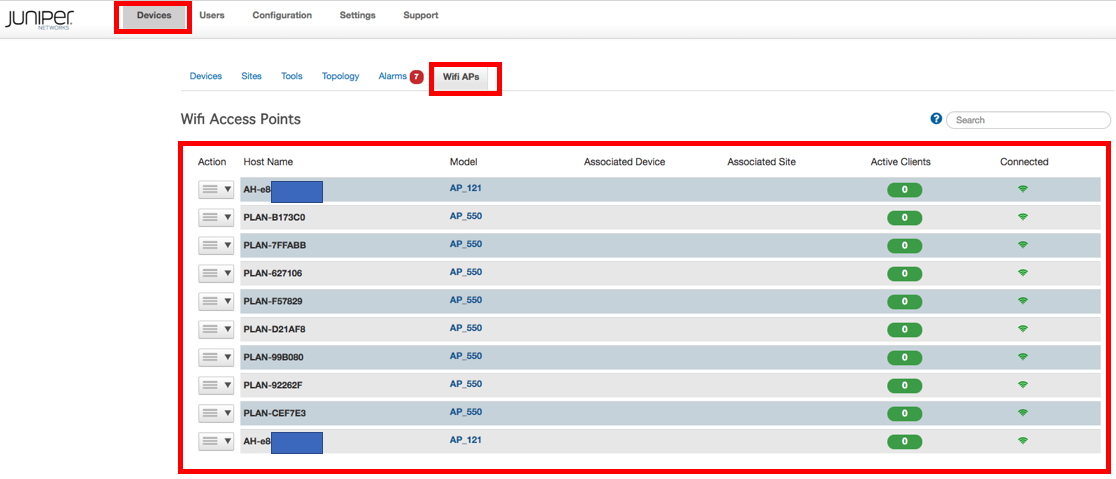
You can click the dropdown box/link next to each AP for more information, or a link back to HiveManager.
